

4 Steps to Lock Event Ship Dates With Swag Kitting

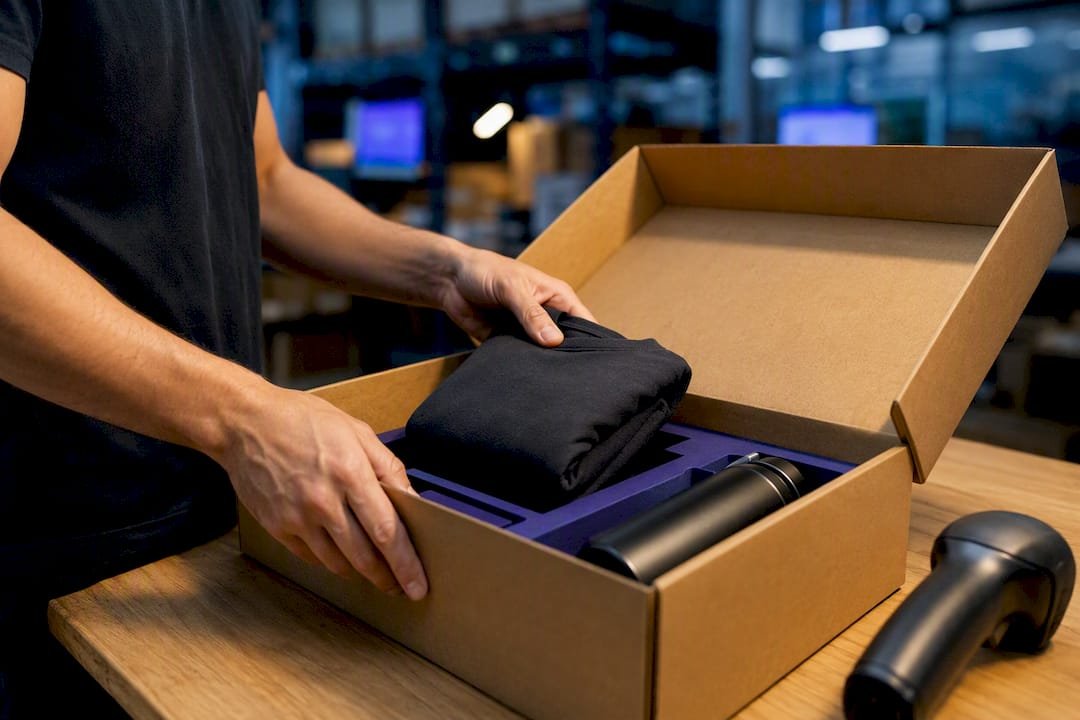
Swag kitting means pre-building multiple branded items into a single unit, given its own SKU and barcode, then storing and shipping it as one piece. If you need reliable distribution at events, onboarding, or PR mailers, kitting beats piecing items together per order. Start by locking the per-kit budget, finalizing contents, and confirming your supplier’s lead time before you commit to a ship date.
TL;DR:
- Swag kitting involves pre-building branded item sets into single units with their own SKU and barcode, ideal for high-volume, recurring shipments.
- Costs vary based on contents and packaging, typically under $10 for basic kits and over $25 for premium options, with lead time requiring at least two weeks for custom items.
- Ensuring accurate fulfillment demands a documented work order, barcode labeling, clear turnaround agreements, and quality checks on item count and packaging before shipping.
- Shipping logistics depend on matching box size to kit dimensions, managing dimensional weight, and consolidating shipments to reduce costs; buffer time is crucial for custom or multi-item kits.
- Effective onsite distribution requires pre-staged kits, clear labeling, staff briefing, and contingency plans for missing items to ensure smooth completion at events.
Table of Contents
- What Is Swag Kitting and How Does It Differ From Bundling?
- How Do You Plan a Swag Kit People Actually Want?
- What Should You Consider When Sourcing and Branding Kit Items?
- How Does the Kitting and Fulfillment Workflow Actually Work?
- What Drives Shipping Timelines and Per-Kit Costs?
- How Do You Handle Onsite Distribution at Events?
- How Do You Measure ROI on a Swag Kit Program?
- What I’ve Learned Running Swag Kits at Discountswag
- How Discountswag Supports Your Kitting Program
- Sources
- FAQ
What Is Swag Kitting and How Does It Differ From Bundling?
Kitting is the fulfillment process of grouping several individual SKUs into one pre-built kit that’s stored, picked, packed, and shipped as a single unit. That single barcode is what separates a real kit from a pile of items stuffed in a box at the last minute, and it’s why kitting shows up in ShipBob’s warehouse process guide as a distinct fulfillment category, not just a packing style.
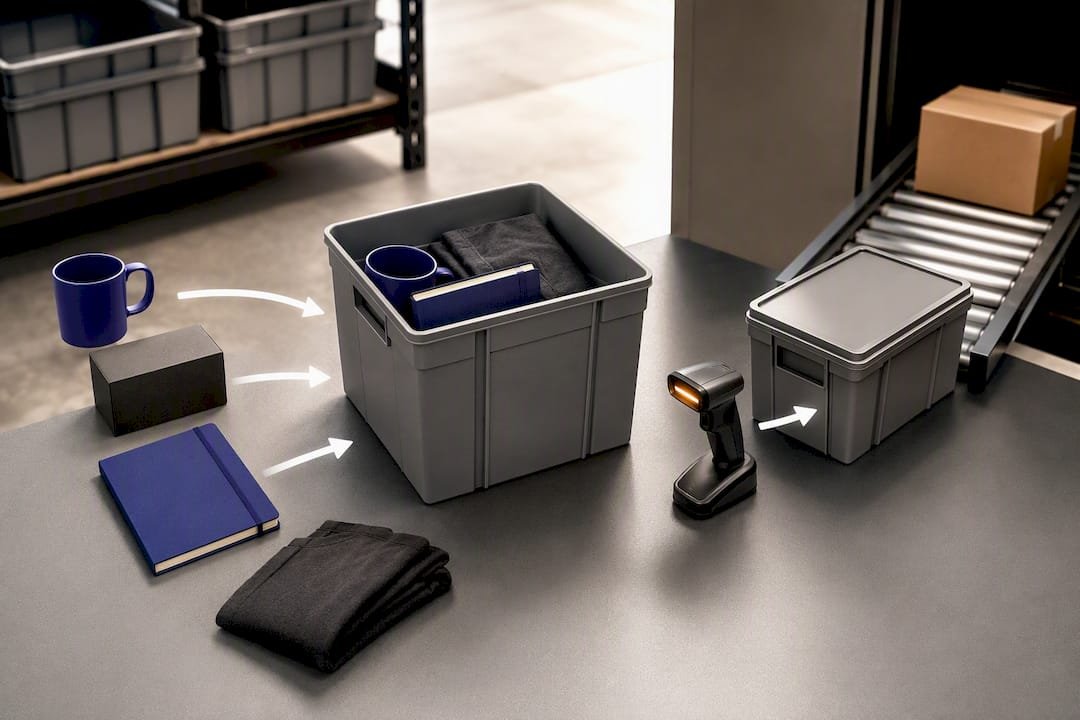
The key distinction: kits are built before an order ever arrives, while bundles get assembled after a customer requests one. NetSuite’s guide to inventory kitting frames this as an operational choice, not a cosmetic one. Pre-kitting works best for stable, high-volume sets you’ll ship repeatedly. Virtual bundling makes more sense when items also sell individually or need last-minute personalization.
Marketers lean on kitting for a handful of recurring situations:
- Conference welcome kits handed out at registration
- New-hire onboarding packages mailed before day one
- Influencer and PR mailers built around a product launch
- Field swag drops for sales teams working multiple territories
Each of those needs consistent contents at scale, which is exactly what pre-kitting is built for.
How Do You Plan a Swag Kit People Actually Want?
Start with the objective, not the merchandise. A kit built for brand awareness looks different from one built for retention or lead generation, and confusing the three wastes budget on the wrong items.
- Define the goal first. Awareness kits favor visible, shareable items. Retention kits favor useful, everyday objects tied to company culture. Lead-gen kits favor items paired with a code or landing page that forces a follow-up action.
- Map the audience. A developer conference crowd wants different items than a sales kickoff crowd. Build a quick persona checklist: role, environment (desk vs. field), and what they’ll actually carry home.
- Set the budget band. Sub-$10 per kit usually means stickers, pens, and a printed insert. $10 to $25 opens up drinkware and basic apparel. Above $25 gets you tech accessories or premium apparel as the anchor item.
- Build the contents checklist. Every solid kit needs a hero item (the thing people remember), a practical utility item (the thing they keep using), a collateral insert (card, QR code, or note), and branded packaging or a label that ties it together.
The 15 employee onboarding swag examples Discountswag has documented show this pattern in action: one standout item, one functional item, and consistent packaging across every kit in the run.
What Should You Consider When Sourcing and Branding Kit Items?
Branding decisions and material choices are where per-kit cost either stays on budget or quietly balloons. A logo that’s too large reads as cheap; one that’s barely visible wastes the impression. Aim for a placement and size that reads clearly at arm’s length without covering the whole product.
- Match imprint method to material: screen printing for apparel, laser engraving for metal and wood, full-color digital print for drinkware and tech.
- Weigh sustainability against cost. Recycled materials often cost more upfront but photograph better for PR kits and social unboxing content.
- Always request a physical sample or digital imprint proof before a full production run. Catching a color mismatch on a proof costs nothing; catching it after 500 units ship is expensive.
- Vet suppliers on lead time, minimum order quantity, rush-print availability, and whether sample requests are free or charged.
Pro Tip: Order one physical sample of your hero item even if the supplier sends a digital proof. Screen colors and pantone-matched ink don’t always agree, and you won’t catch that gap until the sample’s in your hands.
How Does the Kitting and Fulfillment Workflow Actually Work?
Kitting follows four steps, and skipping any one of them is where most delays start: decide the components, create a dedicated kit SKU, assemble the kit against a documented work order, then store and pick the finished kit as a single unit going forward.
The most common breakdown happens when individual components also sell on their own. If your branded notebook ships inside a kit and also sells separately on your merch store, you now have two demand streams pulling from one inventory pool. ShipBob’s kitting guide points to this as a recurring accuracy problem, and the fix is either unified inventory tracking across both channels or switching that component to virtual bundling instead of physical pre-kitting.
Before you sign with a fulfillment partner, require these four things in writing:
- A documented kitting work order process, not an informal pick list
- Barcode or kit-SKU labeling on the finished unit, not just the components
- Published turnaround times you can hold them to and reserve in advance
- Packaging treated as its own SKU, so branded boxes and inserts don’t run out mid-campaign
Discountswag’s swag fulfillment guide for business buyers walks through how this plays out for multi-location orders specifically. On quality control, build a packing verification checklist that confirms item count, correct variant (size, color), insert placement, and box condition before a single kit leaves the floor. Skipping that last check is how a hundred kits go out missing the one insert that actually drives your campaign’s tracking.
What Drives Shipping Timelines and Per-Kit Costs?
Custom items typically need more lead time than stock items, and assembled kits need even more on top of that since every component has to land before assembly starts. Build in buffer time between your last component’s arrival and your ship date. A week is thin; two is safer for anything with more than three items in it.
Shipping cost comes down to a few concrete levers:
- Dimensional weight, not just actual weight, drives most carrier pricing, so an oversized box with a light item inside can cost more than a dense, tightly packed one
- Standard box sizes matched to your kit’s actual footprint reduce dimensional weight charges
- Nested packing and protective inserts add minimal cost but prevent damage claims and reshipments
- Consolidated shipments to a single event venue or office, rather than shipping each kit individually, cut per-unit cost noticeably
Local fulfillment nodes and pre-staging inventory ahead of a known event date are the two best ways to avoid a rush surcharge showing up on your invoice.
How Do You Handle Onsite Distribution at Events?
Getting kits built is half the job. Getting them into the right hands onsite is the other half, and it’s where a lot of otherwise solid programs fall apart.
- Stage kits on arrival: label boxes by session or table assignment, store them somewhere secure, and check for anything sensitive to heat or humidity.
- Pick the right distribution model for the moment: pre-assigned kits for VIPs, a giveaway table for foot traffic, session handouts for breakouts, or a scheduled swag drop for sales teams in the field.
- Brief your staff with a short script and a scanning or check-out process if you need to track who received what.
- Have a contingency plan ready for missing items or a late shipment, including a backup item that can substitute without derailing the layout.
Discountswag’s distribution tips for marketing teams cover these onsite scripts in more detail if your team is running its first tracked giveaway.
How Do You Measure ROI on a Swag Kit Program?
The metrics that matter most: cost per engaged lead, redemption rate on any code or QR link inside the kit, conversion lift among event attendees who got a kit versus those who didn’t, and retention uplift for onboarding kits measured against 90-day employee surveys.
Track it with tools you already have access to:
- Unique promo codes tied to each campaign or event
- Dedicated landing pages that only kit recipients receive
- QR codes printed on the collateral insert, not buried inside the box
- A short post-event survey sent within a week, while the kit is still fresh in someone’s mind
Use a conservative attribution window, generally 30 to 60 days for event-driven kits, and don’t credit every downstream conversion to the swag itself. The branded swag campaign strategy guide breaks down attribution modeling in more depth if you’re building a program you’ll repeat quarterly.
What I’ve Learned Running Swag Kits at Discountswag
Delays almost never come from the merchandise itself. They come from someone approving a proof three days late or nobody confirming a fulfillment slot until the week of the event. My checklist stays short on purpose: confirm lead time in writing, approve every proof within 24 hours, and reserve your fulfillment slot before contents are even finalized.
The single biggest fixable mistake is treating packaging as an afterthought instead of its own line item with its own lead time. Our shipping guide for swag kits walks through the exact sequencing that avoids this.
— Jerry
How Discountswag Supports Your Kitting Program
Custom kits with rush ordering and fulfillment to single or multiple locations can simplify your process, so you’re not juggling separate vendors for items, assembly, and shipping. That’s the practical advantage over stitching a kit together yourself: one order, one point of contact, one timeline to manage instead of five.
If you’re still deciding what belongs in the box, the promotional products versus corporate gifts comparison breaks down which category fits your campaign goal before you commit budget. For PR and influencer mailers specifically, Influenna’s media kit examples show how outreach kits get structured for creators, which pairs well with a physical swag component. Once your contents list is set, start a quote through Discountswag’s promotional items for brand awareness guide and confirm your lead time before you lock an event date.
Sources
External process detail: ShipBob’s kitting guide and NetSuite’s inventory kitting overview. Internal next steps: inventory management for marketing swag and the shipping guide without delays.
- What is Kitting? Warehouse Kitting Process Guide for 2026
- Kitting and inventory kitting guide — NetSuite
FAQ
What Is Swag Kitting?
Swag kitting is pre-assembling multiple branded items into one packaged unit with its own SKU and barcode, so it’s stored, picked, and shipped as a single piece rather than assembled per order.
What Is Kitting and Assembly in a Warehouse Context?
Kitting and assembly refers to the physical process of combining component SKUs into a finished kit against a documented work order, then storing the completed kit as new inventory.
How Much Does Swag Kitting Cost?
Per-kit cost depends on item selection, packaging, and shipping weight, with basic kits often running under $10 per unit and premium tech or apparel kits running $25 or more; get a quote based on your specific contents and volume.
How Far in Advance Should I Order a Swag Kit?
Plan for the lead time of your slowest custom item plus assembly and shipping buffer, generally two or more weeks for multi-item kits, and confirm your supplier’s published turnaround before setting an event date.
What’s the Difference Between Kitting and Bundling?
Kitting builds the kit before any order arrives, while bundling assembles items together only after a customer places an order, making kitting better for high-volume, repeat campaigns and bundling better for personalized or low-volume orders.
 Bottle Carriers
 Mugs
Mugs