

Bulk Custom Apparel Sizing Order Guide That Reduces Reorders

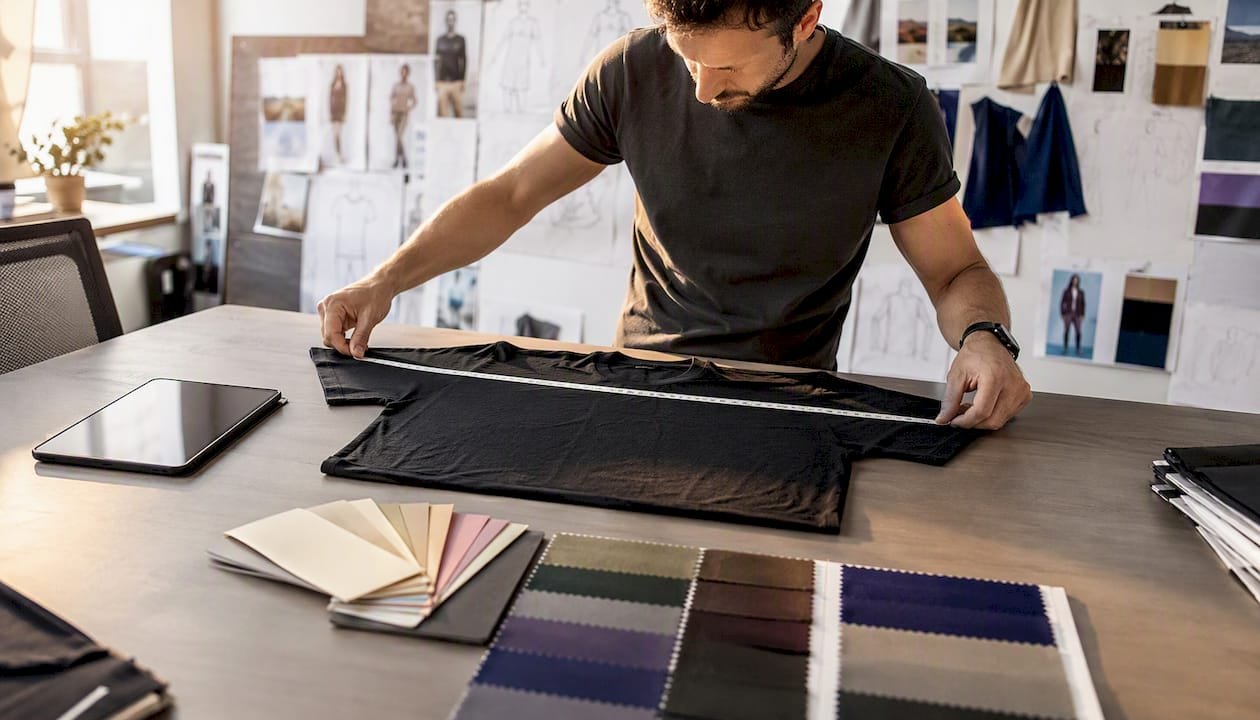
That single habit prevents the majority of bulk-order reorders. Here is exactly what to send:
- A garment-measurement table with half-chest, shoulder width, body length, and sleeve length in inches for each size in your run
- A finalized size-run breakdown showing quantity and percentage per size, totaling headcount plus buffer
- Decoration and fit-allowance notes specifying print placement, embroidery backing, and any pre-shrunk or relaxed-fit adjustments
- A pre-production sample request confirming you want a physical sample or photo approval before bulk cutting begins
ASTM International publishes the measurement standards that reputable suppliers use to grade apparel. The FTC’s apparel labeling guidance governs how care and fabric content must be disclosed, which directly affects how much shrinkage to expect after the first wash. Discountswag handles bulk fulfillment, sample gating, and split-pack shipping for corporate and event orders, so the files above are exactly what their team needs to move your order forward without back-and-forth delays.
Key Takeaways
Submitting garment measurements, a size-run template, and a signed sample approval before bulk cutting is the single most effective way to prevent reorders on a custom apparel order.
| Point | Details |
|---|---|
| Use garment measurements | Submit half-chest, shoulder, length, and sleeve in inches — not size labels — to match supplier spec sheets. |
| Pick the right template | Use corporate, event/giveaway, or youth percentage templates and adjust based on your actual survey data. |
| Add a 5–10% buffer | Order headcount plus buffer; allocate extras proportionally, with extra weight on extended sizes. |
| Require a sample gate | Approve a physical or photo sample, wash-test it, and sign off before bulk cutting begins. |
| Discountswag for fulfillment | Send Discountswag your measurement table, artwork, and packout instructions to get a quote and sample review. |
Table of Contents
- How do you collect accurate size data from a group?
- How to measure for custom apparel: the exact steps
- How do you choose between unisex, men’s, women’s, and youth fits?
- How do you build a size run from your group’s data?
- What sizing mistakes do bulk buyers make most often?
- What do you need to decide before submitting the final order?
- What measurement standards and approval steps should you require from suppliers?
- Pre-submit checklist: confirm these before you place the order
- An experienced supplier’s take on what actually goes wrong
- Discountswag makes bulk sizing and fulfillment straightforward
- Sources
How do you collect accurate size data from a group?
The method you choose depends on your timeline, your group’s willingness to participate, and whether you can get people in the same room. Three approaches cover most situations.
Online size survey is the fastest for distributed groups. Send a form asking each person for their gender or fit preference (men’s, women’s, unisex), height, weight, chest or bust measurement, and preferred fit (slim, regular, or relaxed). Include a brief instruction with a diagram so respondents measure correctly rather than guessing from a label they remember. Set a hard deadline and send two reminders. The main risk is self-reported data: people round up on height and down on chest, so build a slightly more generous buffer into your extended sizes.
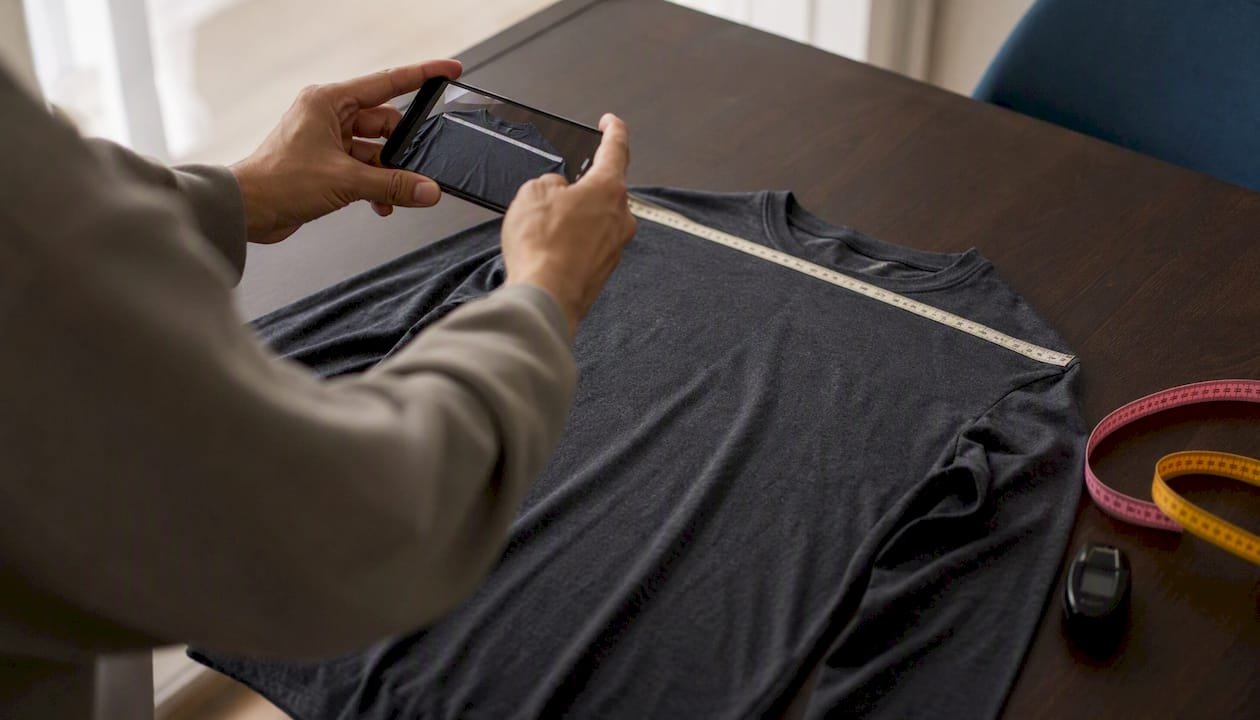
Send-a-garment (flat-lay measurement) is the most accurate low-effort option for remote groups. Ask each participant to photograph a well-fitting shirt or jacket laid flat on a table, with a tape measure visible across the chest. Measuring an existing garment flat gives you the garment dimensions a supplier actually needs, not a body measurement that still requires conversion. It also sidesteps the privacy concern of asking employees for body measurements directly.
Staffed on-site measuring takes roughly two to three minutes per person and produces the cleanest data set. It works well for uniform programs where fit accuracy matters more than convenience. You will need a trained measurer, a soft tape, a data-entry sheet, and a private space. For groups over 100, budget at least half a day.
Pro Tip: For giveaway programs, include a one-line size acknowledgment in your survey: “I understand my selected size is final and exchanges may not be available.” For issued employee uniforms, a signed size release protects both the employer and the vendor if a fit dispute arises later.
Regardless of method, store collected measurements in a shared spreadsheet with columns for name or ID, fit type, each measurement in inches, and the size they map to. Lock the file before you submit to the vendor.
How to measure for custom apparel: the exact steps
Garment measurements beat body measurements for bulk orders in most cases. A body measurement tells you how big a person is; a garment measurement tells the factory how big to make the shirt. The conversion step between the two is where errors accumulate. When you or your group members measure a well-fitting garment instead, you skip that conversion entirely.

That said, body measurements are preferable when you are ordering a fitted cut (a tailored blazer, for example) or when the supplier’s spec sheet is built around body dimensions rather than finished garment dimensions. Check the supplier’s size chart first.
Measurements to collect for tops
- Half-chest (across back, armhole to armhole, laid flat): the single most important measurement for shirts. Multiply by two for full chest.
- Shoulder width: seam to seam across the back, laid flat.
- Body length: from the highest point of the shoulder (or collar seam) to the hem.
- Sleeve length: from the shoulder seam to the cuff edge.
Measurements to collect for bottoms
- Waist: measured flat across the waistband, doubled.
- High hip: 3–4 inches below the waistband, laid flat, doubled.
- Inseam: from the crotch seam to the hem.
- Rise: from the crotch seam to the top of the waistband.
- Thigh: laid flat across the widest point, doubled.
Step-by-step measurement workflow
- Lay the garment completely flat on a hard surface, smoothing out any wrinkles.
- Use a soft measuring tape, not a rigid ruler.
- Measure each dimension twice. Per ASTM-aligned measurement guidance, any discrepancy greater than ½ inch between your first and second reading means you should measure a third time and average the two closest values.
- Record all measurements in inches, noting whether each figure is a half-width or full-width measurement.
- Label every column in your spreadsheet to match the supplier’s spec sheet column headers exactly.
- Photograph the garment flat with the tape measure in frame for each key measurement. Attach those photos to your purchase order.
Pro Tip: Ask participants to measure a garment they wear regularly, not their “aspirational” size. A shirt that fits well today is a better reference than one they plan to fit into.
Measurement accuracy comes down to process discipline. Measuring twice, using a helper or a flat-garment method, and recording units consistently prevents most downstream size problems before they reach the factory floor.
How do you choose between unisex, men’s, women’s, and youth fits?
Fit type is not just a demographic label. It determines the garment’s cut, grading, and how decoration sits on the finished piece.
- Unisex/men’s cut: wider shoulders, straighter torso, longer body length. Works for most promo giveaways where you want one size run to cover a mixed group. The trade-off is that women in the group often find unisex shirts boxy through the waist and may size down, which compresses your small and extra-small quantities faster than expected.
- Women’s cut: tapered waist, shorter body length, narrower shoulders. Appropriate for uniform programs where fit and presentation matter. Requires a separate size run, which adds complexity but reduces the “I never wear it” problem that plagues unisex giveaways.
- Youth cut: shorter proportions throughout, sized by age range or chest measurement. Use for school programs, family events, or any order where participants under 14 are a significant share of the group.
For mixed-gender or age-diverse groups, the most practical approach is a primary unisex run covering the majority, supplemented by a women’s run in the sizes your survey data shows are needed (typically XS–L), and a youth run if children are present. Three parallel runs sound complicated, but they prevent the single biggest complaint in corporate apparel: shirts nobody wears because the cut is wrong.
Fabric and shrinkage change the size you order. A 100% cotton shirt typically shrinks a small percentage after the first wash. If your supplier does not pre-shrink the fabric, size up one step for any garment that will be laundered regularly, such as a staff uniform. FTC apparel labeling rules require care instructions on every garment, so check the label before you finalize your size decisions. For more on material durability and shrinkage, the Discountswag materials guide covers the most common branded-apparel fabric classes.
Decoration effects on fit: embroidery adds a stiff backing that pulls the fabric slightly inward at the chest, which can make a fitted shirt feel tighter. Screen print adds minimal weight but can crack on a shirt that shrinks significantly. Heat transfer is the most sensitive to shrinkage and should only be used on pre-shrunk or synthetic fabrics. If your decoration is large or chest-centered, order a decorated sample and wash it once before approving the bulk run.
Pro Tip: If your group skews female and you are ordering a unisex shirt, shift your size distribution one step smaller than your survey data suggests. Women in unisex cuts typically prefer a size smaller than their measured size for a comfortable fit.
How do you build a size run from your group’s data?
A size run is a percentage distribution across sizes that you convert into quantities based on your headcount. Three templates cover the most common group types.
Size-run distribution templates
Corporate template assumes a professional workforce with a relatively narrow size spread. Event/giveaway spreads weight toward the extremes because you cannot predict who will pick up a shirt at a booth. Youth/school weights toward S–L and drops the extended sizes.
Converting percentages to quantities
Multiply each percentage by your headcount, then round to whole numbers. Check that your rounded quantities sum to your headcount. When rounding pushes you over or under, adjust the middle sizes (M or L) by one unit to rebalance. For example, in a 500-person corporate event with a typical buffer, allocate buffer proportionally across sizes rather than stacking it all in M and L. Extended sizes like 2XL and 3XL tend to run out first at events, so consider adding extras there beyond the proportional share.
Pro Tip: Always order at least two units of every size you include, even if your data shows zero demand for 3XL. One person will always need it, and a reorder for two shirts costs more in shipping and rush fees than the shirts themselves.
A custom clothing sizing system built on sample evidence and tech packs rather than generic labels is the strongest safeguard against bulk-cutting errors. Treat your size-run table as a living document until the sample is approved.
What sizing mistakes do bulk buyers make most often?
Most reorders trace back to one of five errors, all of which are preventable.
- Trusting size labels instead of garment measurements. A size L from one brand measures 22 inches across the half-chest; from another it measures 24 inches. Always map your group’s measurements to the supplier’s own size chart, not to a generic label.
- Ignoring fabric shrinkage. A 100% cotton shirt ordered in the correct size will fit tighter after the first wash if the fabric is not pre-shrunk. Factor shrinkage into your size selection before you submit the order.
- Under-ordering extended sizes. 2XL and 3XL quantities are almost always too low on the first draft. Extended sizes are the first to run out at events and the hardest to reorder quickly.
- Skipping the pre-production sample. No measurement table replaces a physical sample. A sample lets you check fit, decoration placement, and color before 500 shirts are cut. Require one for every new garment style or supplier.
- Poor supplier spec mapping. Sending a size chart that uses different column headers than the supplier’s spec sheet causes misinterpretation. Match your column names to the supplier’s exactly, or include a mapping key.
Quick fixes when problems surface before production:
If your measurement set is inconsistent (some participants measured body, others measured garment), flag the discrepancy to the supplier and ask them to apply a standard conversion offset rather than mixing the two data types in the same size chart.
If a pre-production sample shows a shrink variance, ask the supplier for a test wash on the decorated sample before approving bulk cutting. This is standard practice and any reputable vendor will accommodate it.
Set acceptance tolerances in your purchase order. A common standard is ±½ inch on chest and length, ±¼ inch on shoulder width. Acceptable Quality Level (AQL) sampling, typically AQL 2.5 for apparel, defines how many units from a production run are inspected and what defect rate triggers a rejection. Ask your supplier which AQL level they apply and get it in writing.
What do you need to decide before submitting the final order?
Production timelines have more gates than most buyers expect. Missing one pushes the delivery date.
| Gate | Typical lead time | What you approve |
|---|---|---|
| Sample request | several days | Fit, color, decoration placement |
| Pre-production signoff | 1–2 days | Signed sample approval, measurement tolerances |
| Production | several days | Garments cut and sewn |
| Decoration | 5–10 days | Print, embroidery, or heat transfer applied |
| Packout and shipping | several days | Sorted, labeled, and shipped |
Rush production compresses production and decoration time but rarely the sample gate. If you skip the sample to save time, you absorb the full reorder risk.
Packout and labeling decisions to make before you submit:
- Size stickers on polybags: the simplest option for event distribution where recipients self-select.
- Person- or department-based splits: each bag labeled with a name or department code. Required for uniform programs; adds 1–3 days to packout.
- PO packing list: a printed manifest inside each box showing contents by size and quantity. Standard for warehouse receiving.
At a 500-person event, that is roughly 25 shirts kept in a separate bag, sorted by size, accessible to the distribution team.
Final signoff checklist before you release the order:
- Measurement table attached and column headers match supplier spec sheet
- Size-run quantities sum to headcount plus buffer
- Sample approved with photos on file
- Decoration specs confirmed (placement, color, technique)
- Packout instructions written and attached to PO
- Lead times confirmed in writing with delivery date
- AQL tolerance and inspection requirements documented in PO
For more on avoiding timeline surprises, the Discountswag guide on ordering branded merch without delays covers the most common production bottlenecks in detail.
What measurement standards and approval steps should you require from suppliers?
The measurement practices that produce consistent bulk apparel results are not proprietary. They follow documented standards and a repeatable sample gate.
ASTM International publishes sizing standards for apparel that define how measurements are taken and graded across sizes. Reputable suppliers build their spec sheets around these standards, which is why step-by-step measurement methods aligned with ASTM standards are repeatable and produce consistent results when done correctly.
Recommended recording template for vendors
Send your supplier a spreadsheet with these columns: Size, Half-Chest (inches), Shoulder Width (inches), Body Length (inches), Sleeve Length (inches), Waist (inches, if applicable), Notes. Every measurement should be a finished garment measurement, not a body measurement, unless the supplier’s spec sheet specifies otherwise. Suppliers also publish their own size charts with garment measurements; mapping your data to the supplier’s own spec sheet reduces interpretation errors at the factory.
Sample approval flow
- Request a pre-production sample in your most common size (typically M or L).
- Review fit, decoration placement, and color against your approved artwork.
- Wash the sample once and re-measure. Compare against your original measurement table.
- If measurements are within tolerance (±½ inch chest, ±¼ inch shoulder), sign the sample approval form.
- Attach the signed approval and measurement photos to the purchase order before bulk cutting begins.
Include your tolerance thresholds in the PO itself, not just in an email. A written tolerance in the purchase order is enforceable; a verbal agreement is not. For any new garment style or supplier, treat the sample gate as non-negotiable regardless of timeline pressure.
Pre-submit checklist: confirm these before you place the order
Run through this list in the minutes before you hit submit. Each item represents a category of reorder that buyers have paid for by skipping it.
Measurement and size run:
- Garment-measurement table attached, with units labeled (inches, half-width noted)
- Column headers match supplier spec sheet exactly
- Size-run quantities sum to headcount plus buffer (5–10%)
- Extended sizes (2XL, 3XL) reviewed and not under-ordered
Sample and decoration:
- Pre-production sample approved, photos on file
- Decoration technique confirmed (screen print, embroidery, or heat transfer)
- Decoration placement marked on tech pack or photo
- Shrinkage and fabric type noted; size-up applied if needed for non-pre-shrunk cotton
Logistics and packout:
- Packout method selected (size stickers, name labels, or department splits)
- PO packing list format confirmed with supplier
- Delivery address and split-ship destinations confirmed
- Buffer stock quantity noted for on-site reserve
Final approvals:
- Confirm lead times in writing and lock the delivery date.
- Verify AQL inspection level is documented in the PO.
- Get a named contact at the supplier for fit clarifications during production.
- Lock measurement tolerances in the PO before signing.
An experienced supplier’s take on what actually goes wrong
The most preventable production problems are not measurement errors. They are communication gaps.
Buyers send a size chart as a screenshot from a brand’s website, the supplier interprets it as a body-measurement chart, and 500 shirts come back a full size too large. Or a buyer approves a sample by email without attaching the measurement table, and the factory cuts to a slightly different spec for the bulk run because nobody flagged the discrepancy.

The fix is not more sophisticated measurement tools. It is being explicit in writing, every time. Attach the measurement table as a spreadsheet, not a photo of a spreadsheet. Request a pre-production photo of the decorated sample before it ships. Confirm packout splits in the PO, not in a chat message that disappears in a thread.
Document every approval. When a fit dispute arises after delivery, the buyer who has a signed sample approval form, a measurement table, and a photo of the approved sample on file resolves it in hours. The buyer who approved by text message resolves it in weeks, if at all. Discountswag’s corporate apparel buying guide outlines the approval documentation steps their team uses to keep bulk orders on track.
Discountswag makes bulk sizing and fulfillment straightforward
Sizing a bulk apparel order correctly is the hard part. Discountswag handles what comes next: sample ordering, pre-production photo approvals, decorated sample review, and split-pack fulfillment to single or multiple locations nationwide.
To get a fast quote, send Discountswag your garment-measurement table, logo artwork file, headcount by size, desired delivery window, and packout instructions. Their team reviews measurement specs and flags inconsistencies before production starts, which is the step that prevents most reorders. Rush production options are available for tight timelines, and their event merchandise planning guide covers the full workflow for event-specific orders. For a broader look at what Discountswag offers across apparel and promotional products, the promotional items guide for brand awareness is a good starting point. Request your quote at Discountswag.
 Bottle Carriers
 Mugs
Mugs