

Imprint Area: Size Charts and File Prep for Promo Buyers

An imprint area is the maximum printable zone on a product where your logo or artwork can go, and it determines both the size and the position of your design. Boundaries shift depending on the product and the decoration method, so a full-front print on a hoodie is never the same size as one on a youth t-shirt. Before finalizing artwork, ask your decorator for the exact imprint measurements for your specific blank and print method.
TL;DR:
- The imprint area varies depending on product shape, seams, hardware, and decoration method, so always confirm exact measurements with your decorator beforehand.
- Screen printing is limited by platen size and mesh count, embroidery by stitch density and hoop size, and DTG struggles on textured or synthetic fabrics, affecting feasible design sizes.
- Typical dimensions include up to 11-12 inches wide by 12-14 inches tall for adult full front prints, with youth sizes scaled proportionally smaller, but final size depends on equipment.
- Artwork must be submitted as vectors or at 300 dpi at final size, with clear specifications for colors, underbase, and file outlines to ensure a clean, accurate print.
- Confirm imprint measurements, print method, and scaling rules early in the order process to prevent delays and costly reprints, especially on rush orders or multi-size runs.
Table of Contents
- What Is an Imprint Area, Exactly?
- How Print Method Changes the Imprint Boundary
- Imprint Areas by Product Type
- Typical Imprint Area Dimensions and How They Scale
- Artwork and File-Prep Rules That Keep Imprints Clean
- Practical Tips to Avoid Reprints and Placement Mistakes
- How a distributor handles imprint area on every order
- Why Imprint Discipline Saves Real Money on Large Orders
- Where to Check Imprint Charts and File-Prep Specs
- Sources
- FAQ
What Is an Imprint Area, Exactly?
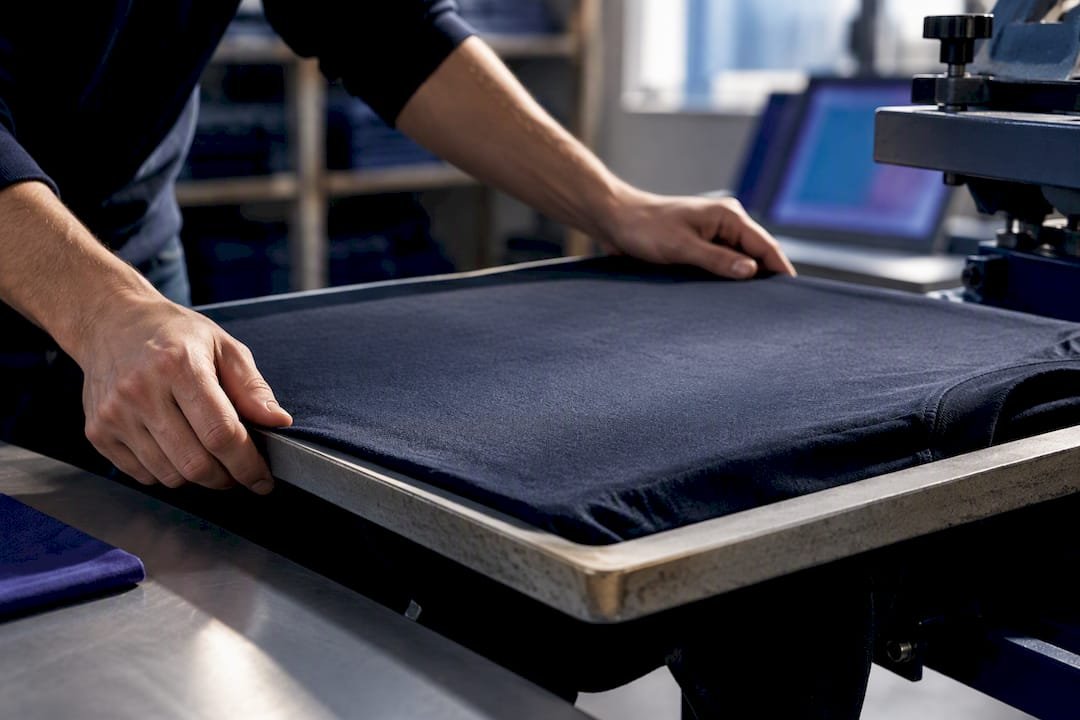
The imprint area is the outer boundary a design can’t cross before it runs into a seam, a collar, a zipper, or the physical limits of the printing equipment. On a screen-printed t-shirt, that boundary is set by the platen, the flat board that holds the garment in place under the screen. Platens come in fixed sizes, so even if you wanted a 16 inch wide chest print, the equipment itself would stop you.
Seams and trims matter just as much as machinery. A hoodie’s front pocket, a polo’s collar placket, or a jacket’s zipper all eat into usable space, which is why the same “full front” location looks different across product types. A standard imprint area is defined by whichever constraint hits first: fabric, hardware, or press bed.
Who sets these numbers? Usually the decorator or the supplier, not the buyer. Screen printers, embroiderers, and promotional distributors publish spec sheets that list:
- The named location (full front, full back, left chest, sleeve, hat panel)
- Maximum width and height in inches for that location
- Any product-specific limits caused by seams, pockets, or curved surfaces
Designers size artwork to these published dimensions, not the other way around. If you build a logo file first and try to force it into an imprint area later, you’ll often end up cropping or shrinking elements you didn’t want to touch.
How Print Method Changes the Imprint Boundary
The decoration method you choose changes what’s physically possible, sometimes more than the product itself does. Five methods dominate promotional apparel and each comes with its own rulebook.
- Screen printing is bound by the platen size and by mesh count. Fine detail and gradients need higher mesh counts, and halftone settings around 45 lpi at a 61 degree angle with an elliptical dot are common for simulated-process work to avoid moiré patterns.
- Embroidery caps out based on stitch density and hoop size, and tiny text becomes unreadable fast. Letters below a certain stroke height blur into a solid blob of thread, so fine script or thin serif fonts rarely survive on a small hat panel.
- DTG (direct to garment) handles full-color photographic art well on flat cotton surfaces, but it struggles on synthetic blends and heavily textured fabric, which limits which products qualify even when the imprint area looks generous on paper.
- Heat transfer and DTF (direct to film) print on a separate substrate before pressing, so edge adhesion near seams and curves becomes the limiting factor rather than the press bed itself.
- Pad printing, common on pens and small plastic items, only transfers a shallow image from an etched plate, which forces flat, simple, low-detail art regardless of how much physical surface the item offers.
A large tote bag might technically offer 12 inches of blank canvas, but if you’re using pad printing on an attached plastic buckle instead of screen printing on the fabric, your real imprint area is a fraction of that.
Pro Tip: Ask which decoration method your decorator plans to use before you finalize file dimensions. The same shirt can carry a 12 inch screen print or a 4 inch embroidered patch, and each needs a completely different source file.
Imprint Areas by Product Type
Every product category comes with its own conventional imprint zones, shaped by decades of production practice as much as by physics.
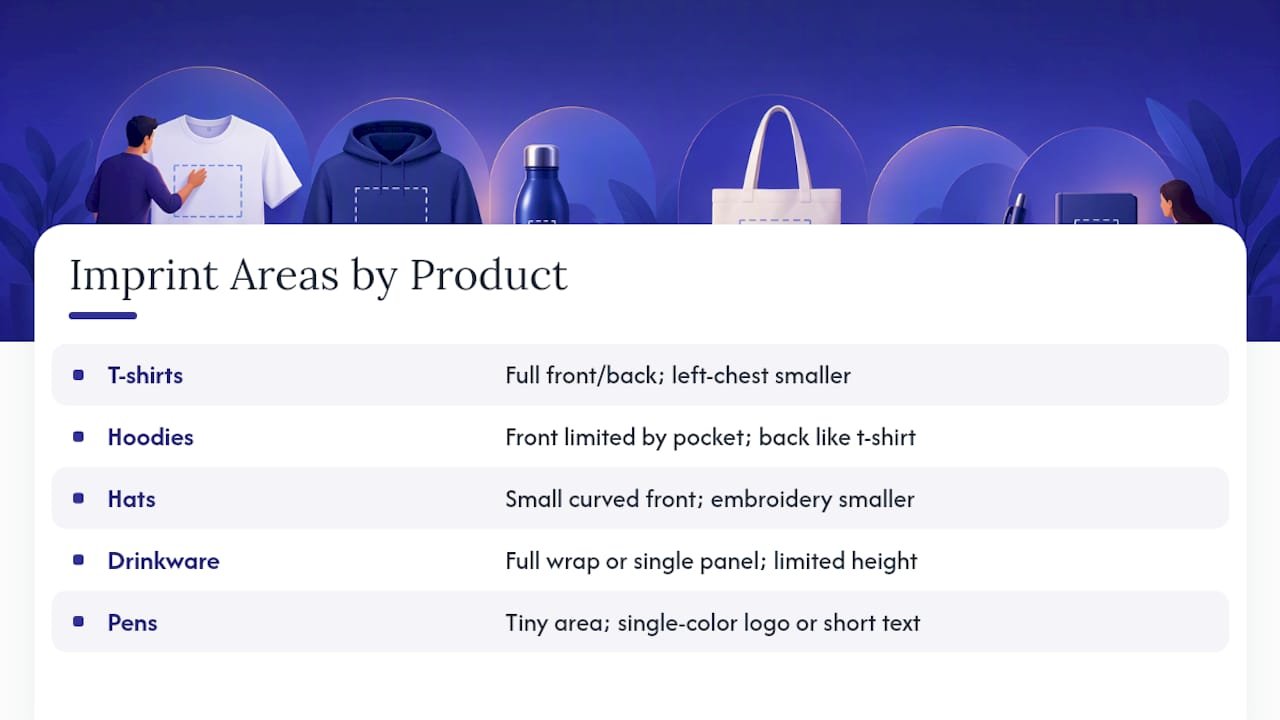
T-shirts typically offer three usable locations: full front, full back, and left chest. Full front and full back run largest, since they sit on flat, seam-free fabric. Left chest sits smaller by design, matching where a woven emblem or embroidered logo would traditionally go on a polo or button-down.
Hoodies complicate things because of the center pocket. A front print has to either sit above the pocket, get split around it, or shrink to fit the space between the pocket and the collar. Back prints on hoodies run closer to t-shirt full-back dimensions since the back panel stays flat and uninterrupted.
Hats limit you to a small front panel, and the decoration method matters even more here than the garment does. Embroidery on a curved front panel caps out well below what a flat patch could hold, since stitching has to follow the curve without puckering the fabric.
Drinkware works in wraps or panels rather than the rectangular boxes apparel uses. A full wrap around a tumbler uses the entire circumference, while a panel print sits on one flat or gently curved face. Vertical space is usually the tighter constraint, since most bottles and mugs are taller than they are wide but curve too much for a design to wrap top to bottom.
Pens and other micro items demand the most restraint. There’s rarely room for more than a single-color logo and maybe a short line of text. Trying to cram a full-color emblem onto a pen barrel usually ends in illegible, muddy print.
Bags and flat goods need edge allowances, typically a quarter inch to a half inch of buffer from any seam or handle attachment point, so repeat patterns and full-panel designs don’t get swallowed by stitching.
Typical Imprint Area Dimensions and How They Scale
Concrete numbers help more than vague guidance, so here’s what published charts commonly list for adult apparel.
| Location | Typical dimensions | Notes |
|---|---|---|
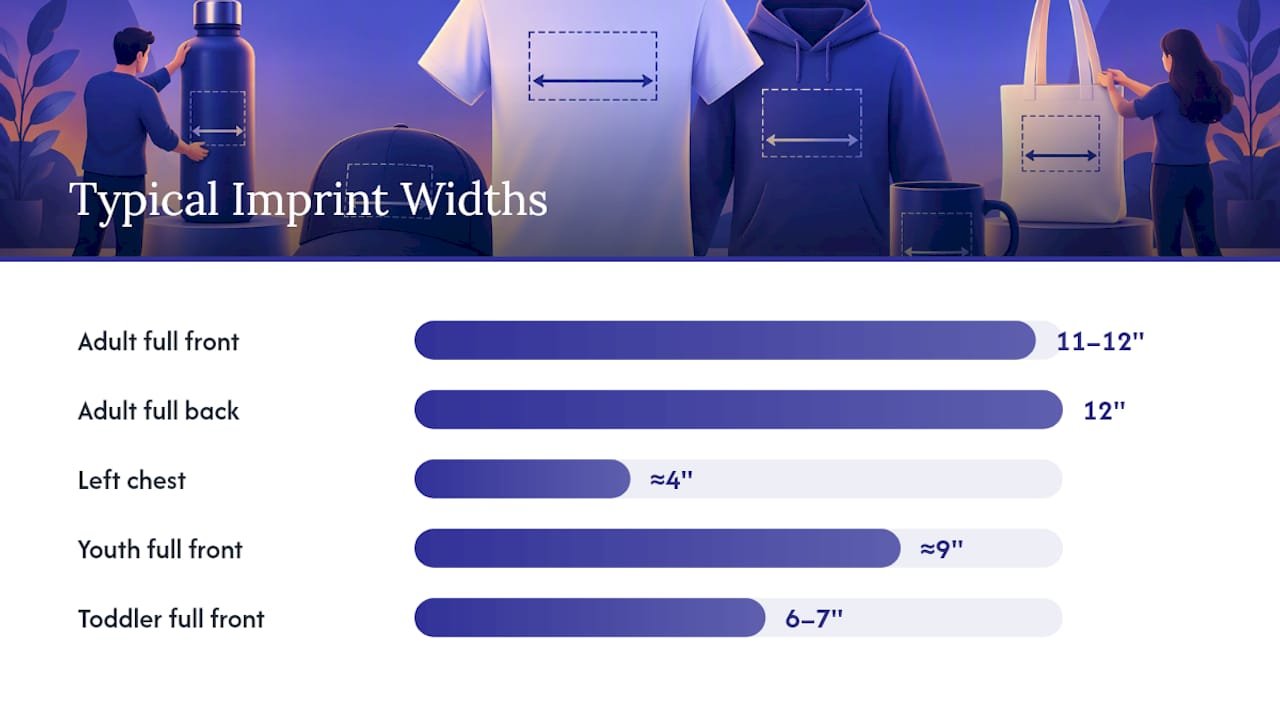
| Adult full front | Up to 11"–12" wide by 12"–14" tall | Common ceiling for standard press setups |
| Adult full back | Up to 12" wide by 14"–16" tall | Slightly taller than front on many charts |
| Left chest | Around 4" wide by 4" tall | Matches traditional embroidery placement |
| Youth full front | Around 9" wide, scaled proportionally | Smaller press area for youth blanks |
| Toddler full front | Smaller still, often 6"–7" wide | Reduced further for garment size |
These figures represent common industry ranges rather than fixed rules; your decorator’s own equipment sets the final word. When an order spans youth, adult, and plus sizes in the same run, printers usually handle the size difference one of two ways: scaling the same artwork proportionally down (or up) per size block, or asking you for separate files sized to each block’s own imprint area. Skipping that conversation is one of the most common causes of mismatched proportions across a size run.
Embroidery adds its own scaling ceiling. Most digitizers cap embroidered designs around 4 inches in any direction for chest and hat locations, and minimum letter height for legible embroidered text usually falls between a quarter inch and three-eighths of an inch, depending on the font.
Artwork and File-Prep Rules That Keep Imprints Clean
Getting the imprint area right on paper means nothing if the file itself can’t print cleanly at that size. A few rules govern almost every job:
- Use vector files for logos and text whenever possible. Formats like AI, EPS, or vector PDF scale to any imprint size without losing edge sharpness, since the underlying math redraws the shape at any resolution.
- When raster is unavoidable, supply it at 300 dpi at final print size, not scaled up from a smaller web graphic. A logo pulled from a website at 72 dpi will pixelate the moment it’s enlarged to fill an 11 inch chest area.
- Decide between spot color and four-color process early. Spot color uses one film per color and keeps costs down for simple logos, while four-color process separates artwork into CMYK for photographic or gradient-heavy designs.
- Include an underbase for dark garments. A white underbase layer sits beneath colored ink so bright tones don’t turn muddy against a black or navy shirt.
- Save fonts as outlines and send layered originals, along with a Pantone or CMYK swatch reference so color doesn’t drift between your screen and the final print.
Statistic Callout: Halftone work for simulated-process printing commonly runs around 45 lines per inch at a 61 degree angle using an elliptical dot, with mesh counts near 156 for the underbase and 230 for top colors, a combination that keeps color vibrant without triggering moiré patterns.
Practical Tips to Avoid Reprints and Placement Mistakes
Most reprint requests trace back to a handful of avoidable mistakes, not equipment failure.
- Request exact imprint measurements for your specific blank and method before locking in final art dimensions.
- Supply separate scaling rules, or separate files, when an order mixes youth and adult sizes.
- Ask for a digital proof or mockup and confirm how the underbase will be handled on dark garments.
- Simplify fine detail and avoid very small type for embroidery, since thread can’t hold a sharp edge the way ink can.
- Strip complexity from art destined for pens and other micro items; a single color mark almost always outperforms a busy multicolor design at that scale.
- Confirm the final print method and color handling in writing before production starts, not after.
Pro Tip: A design that looks perfect at full-front size can turn into an unreadable smear at left-chest size. Always review a scaled proof at the actual target dimensions, not just at the size it looks good on your monitor.
How a distributor handles imprint area on every order
As a distributor handling apparel, drinkware, bags, and technology items across bulk corporate orders, Discountswag treats imprint-area confirmation as a required step, not an afterthought, especially on rush timelines where there’s no room to reprint. A logo sized wrong for a full-front placement causes more production delays than any other single error, and it’s almost always preventable at the file-review stage.
An ordering checklist to keep jobs on schedule typically includes confirming imprint measurements for the exact blank and decoration method before art is finalized, requesting a proof or mockup at true scale, agreeing in writing on how scaling works across different sizes, clarifying underbase handling for dark garments or items, and locking the print method before sending final files.
Buyers ordering across multiple locations or on a rush timeline benefit most from settling these details early, since a single missed measurement can cascade into delays across an entire shipment.
Why Imprint Discipline Saves Real Money on Large Orders
The biggest production mistakes I see aren’t creative ones. They’re logistical: a buyer sends one logo file and expects it to scale cleanly from a toddler tee to a 3XL hoodie without adjustment, or nobody asks which decoration method is actually being used until the proof comes back wrong. Getting imprint measurements and file prep right before production starts is the cheapest insurance available in this industry. It costs nothing but a few extra minutes of conversation, and it’s the difference between a smooth bulk order and an expensive rush reprint. Check the specs early. Every time.
— Jerry
Where to Check Imprint Charts and File-Prep Specs
For dimension references, the EducationalProducts imprint size and location chart and Abante print area charts cover apparel dimensions by size class. For file prep and separations, the Printing.org screen printing guide and Stahls’ design placement tips cover technical setup and heat-press alignment.
Sources
- IMPRINT — EducationalProducts imprint size & location (PDF)
- Printing
- Design placement tips — Stahls’
FAQ
What Does Imprint Area Mean?
Imprint area means the maximum space on a product where a design can be printed or stitched, bounded by the equipment, the fabric, and nearby seams or trims. It’s set by the decorator or supplier for each specific product and print method, not chosen freely by the buyer.
What Does “Imprint” Mean in Simple Words?
In this context, an imprint is the printed or embroidered design itself, whether that’s a logo, text, or graphic applied to a promotional item. The imprint area is simply the boundary that design has to fit inside.
What Does One Imprint Color Mean?
One imprint color means the design uses a single spot color, applied through one screen or one thread color rather than a full-color process. It’s the simplest and usually least expensive decoration option, common on pens and other small promotional items.
What Is an Example of an Imprint?
A single-color company logo screen printed on the left chest of a polo shirt is a common example of an imprint. Another is a full-color graphic covering the full front of a t-shirt, sized to fit within that garment’s published imprint dimensions.
 Bottle Carriers
 Mugs
Mugs