

Which Embroidery File Format Should You Actually Use?

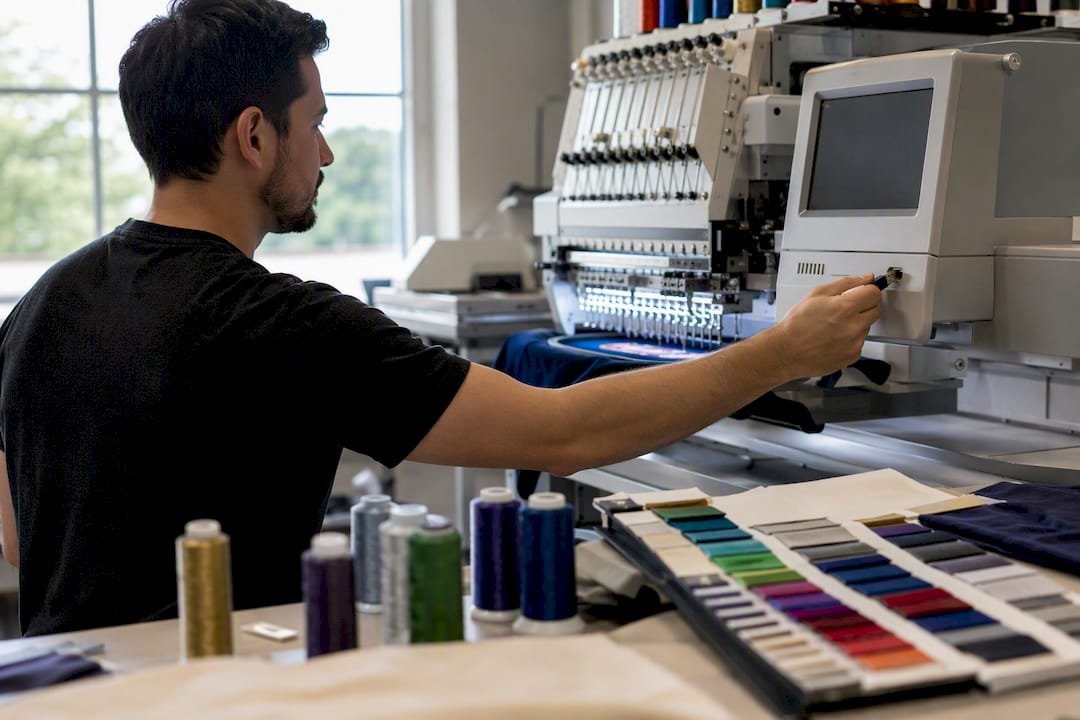
Match your file to your machine, not the other way around. If you’re stitching production runs, save as DST, the coordinate-only format nearly every commercial multi-head machine reads. If you’re on a home machine, use the format your brand ships natively: PES for Brother and Baby Lock, since it carries color-stop metadata your machine reads automatically. Either way, keep a copy of the native design file (EMB, ART) before you export anything, because that’s the only version you can edit later without redoing the digitizing work.
A few quick rules before you dig into the rest of this guide:
- Check your machine’s manual or support page for its exact supported extensions before you buy or download a design.
- If you’re ordering embroidered apparel from a supplier, send a vector logo plus your preferred stitch file, or simply ask them to digitize it for you.
- Never treat a stitch file (DST, PES, JEF) as your master copy. It’s a finished output, not a working file.
Key Takeaways
Matching your stitch file to your specific machine format, and preserving the native design file separately, prevents most of the compatibility and quality problems embroiderers run into.
| Point | Details |
|---|---|
| Match format to machine | Use DST for commercial multi-head equipment and PES, JEF, or VP3 for the matching home brand. |
| Keep native files forever | Store EMB or ART working files separately so you can resize and edit without re-digitizing. |
| Expect conversion losses | Color metadata, trims, and tension settings often don’t survive a format conversion cleanly. |
| Start with vectors | AI, EPS, or SVG artwork gives digitizers clean edges to trace; low-res raster art causes the most rework. |
| Supply the right files to order | Discountswag asks for a vector logo plus a stitch file or digitizing request to keep bulk apparel orders moving quickly. |
Table of Contents
- Understanding Embroidery File Formats and Where They Fit
- Major Embroidery File Extensions and What Each One Stores
- Which Machines Read Which Formats?
- Why Converting Between Formats Can Ruin a Design
- How to Prepare Artwork for a Clean Digitizing Result
- Best Software for Reading and Writing Embroidery Files
- What File Format Questions Come Up When Ordering Embroidered Apparel?
- How Did Embroidery File Formats Develop Over Time?
- Proprietary Formats vs. Open-Source: What’s the Real Difference?
- Common Embroidery File Compatibility Problems and Fixes
- Ready to Order Embroidered Apparel? Here’s What to Send Discountswag
- A Few File Mistakes I’ve Seen Cost People Real Time
- Sources
Understanding Embroidery File Formats and Where They Fit
Every embroidery file falls into one of three categories, and knowing which one you’re holding changes what you can do with it. Confuse them, and you’ll end up trying to resize a finished stitch file, which usually produces puckered, uneven results instead of a clean scaled design.
Native or design files (EMB, ART) are the working layer. They store your artwork as editable objects: shapes, stitch types, sequencing, underlay settings, all still adjustable. Think of a native file like a Photoshop PSD. You can open it years later, swap a color, resize it properly, and re-export.
Machine or stitch files (PES, JEF, DST, VP3) are the instructions your machine actually executes. They’re stripped down to stitch coordinates, thread color changes, and trim commands. There are no editable shapes left, only a flat sequence of needle movements. This is what actually runs through the machine.
Expanded or commercial formats, DST being the dominant example alongside EXP, strip out brand-specific extras entirely and store nothing but universal stitch data. That bare-bones structure is exactly why DST functions as the de facto commercial standard across multi-head production equipment, even though it sacrifices the color-stop automation that home embroiderers rely on.
A typical project moves through these layers in order:
- Start with vector artwork (a logo in AI or SVG format).
- Digitize it into a native file, building stitch types, underlay, and sequencing around the artwork.
- Export a stitch file matched to your target machine.
- Run a test stitch on scrap fabric before committing to the final material.
Pro Tip: Label your native files with the version date and hoop size in the filename. Six months from now, you won’t remember which EMB file was the 4×4 version and which was resized for a jacket back.
Major Embroidery File Extensions and What Each One Stores
Not every format carries the same information, and that gap explains a lot of the compatibility headaches stitchers run into. Some extensions store full color sequences and object data; others are just a list of coordinates with no idea what thread color comes next.
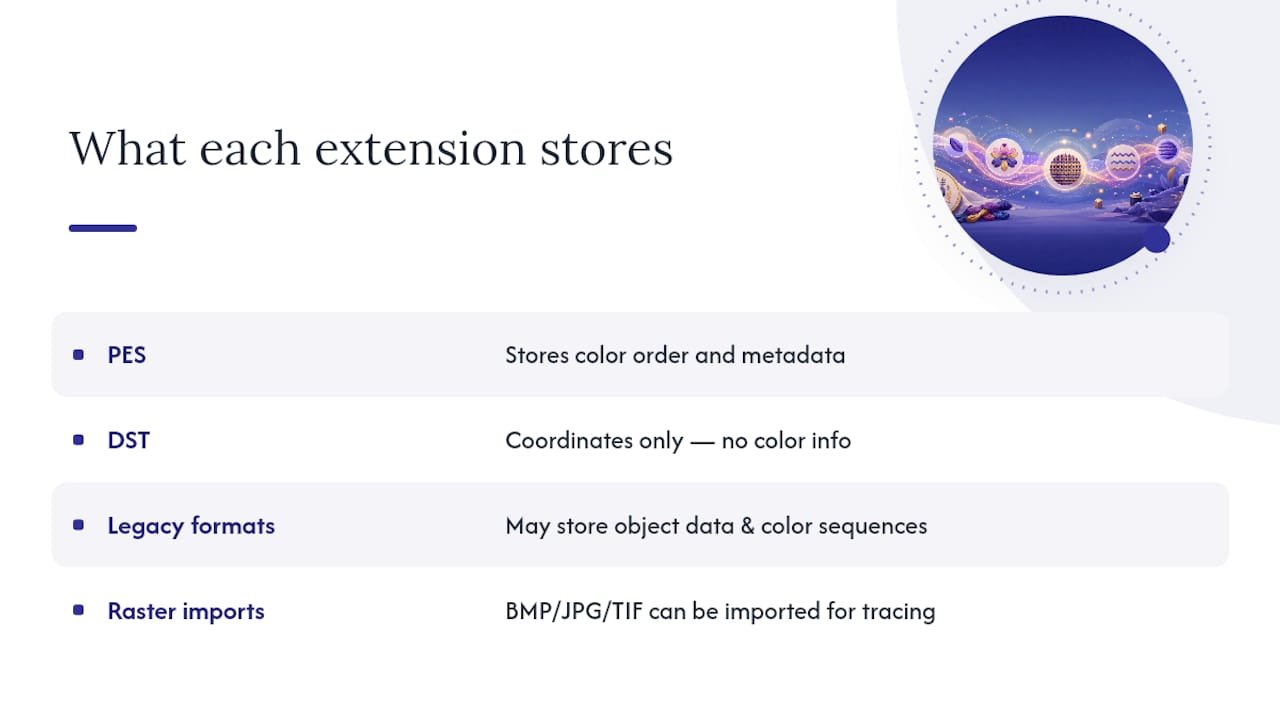
The pattern worth remembering: PES stores color order and metadata while DST holds coordinates only, which is why a DST file opened on a home machine often stitches fine but stops without a color prompt. Embird’s format documentation lists dozens of legacy and commercial extensions beyond this table, including older non-DOS formats still floating around in inherited design libraries, plus support for importing raster images like BMP, JPG, and TIF directly into the software for tracing.
If you’ve inherited a folder of unlabeled files from a previous digitizer or an old hard drive, this table is your fastest way to figure out what you’re actually holding: open the extension, cross-reference the brand column, and you’ll know within seconds whether you’ve got a working native file or a finished stitch file with no further editing room.
Which Machines Read Which Formats?
Machine brands tend to standardize around one native format, and that format almost always traces back to the software the manufacturer bundles with the machine. Knowing the mapping saves you from downloading the wrong file and discovering the mismatch only after your machine throws an error mid-stitch.
- PES runs on Brother and Baby Lock machines, since both brands share embroidery software lineage.
- JEF is Janome’s native stitch format, used across most of their home and semi-industrial lineup.
- VP3 (and older VIP) covers Husqvarna Viking and Pfaff, which share a software platform despite being separate brand lines.
- ART and EXP serve Bernina and Melco respectively, with ART functioning as Bernina’s native editable format and EXP as its stitch output.
- DST is the default for Tajima and most commercial multi-head lines, and it’s also the safest fallback format when you don’t know what a receiving machine supports.
Firmware and software version mismatches cause a surprising share of “my file won’t load” complaints. A machine running older firmware may reject a stitch file exported from a newer version of the same brand’s software, even though the extension matches. Brother’s own support documentation walks through which formats specific Brother models accept, including PES, DST, PHC, and PEN variants, and that kind of model-specific list is exactly what you need to check before assuming compatibility based on extension alone.
Before loading an unfamiliar file, run two checks: look up your machine’s supported extensions list in the manual or manufacturer support page, and if you’re unsure, load a small test design first rather than a full multi-thousand-stitch project. A five-minute test costs you nothing. A failed production run on embroidered blanks costs fabric, thread, and time you don’t get back.
Why Converting Between Formats Can Ruin a Design
Stitch coordinates usually survive a format conversion intact. Almost everything else is a gamble. Converting between embroidery formats typically carries stitch positions through cleanly, but color data, trim commands, and machine-specific parameters often get lost or approximated in the process, which is why a design that looked perfect in its native format can come out wrong after a round-trip conversion.
Here’s what commonly disappears or breaks:
- Color-stop metadata: converting PES to DST strips the embedded color labels, so instead of your machine prompting you for each thread change automatically, it just stops cold and waits for manual intervention.
- Trim commands: some converters drop or misplace trim instructions, leaving trailing threads (called “jump stitches” left untrimmed) that need manual cleanup after the run finishes.
- Tension and speed flags: machine-specific settings tuned for a particular brand’s motor and needle behavior often get ignored entirely by the receiving machine, since they were never universal to begin with.
- Underlay and density settings: dense fills built for one machine’s needle penetration force can look flat or bunched on a different one.
Designs with dense layering, tight registration between elements, or long color sequences suffer the most. A simple one-color text logo survives conversion just fine. A photorealistic portrait with forty thread changes and fine detail work is where you’ll see gaps, misalignment, and color chaos after a lossy round-trip.
Pro Tip: If you must convert, always convert from the native design file, not from an already-converted stitch file. Converting a converted file compounds the losses instead of just applying them once.
How to Prepare Artwork for a Clean Digitizing Result
Good stitched output starts well before anyone opens digitizing software. The artwork you hand over determines how much cleanup a digitizer has to do, and sloppy source files are the single biggest reason quotes come back higher than expected.
- Start with a vector file whenever possible. AI, EPS, and SVG files scale without losing edge definition, which matters enormously once a digitizer needs to trace clean outlines for stitch paths.
- If vector isn’t available, supply a high-resolution raster file, PNG or TIFF, at 300 dpi or higher, sized at the actual final dimensions you plan to stitch. Scaling up a low-res file afterward just enlarges the pixelation along with the image.
- Simplify your color palette before handing off artwork. Gradients and photographic blending don’t translate to thread; a digitizer needs to map each color to a specific thread shade, and fewer distinct colors mean fewer color changes and lower digitizing cost.
- Lock stroke widths and flatten transparencies. Thin lines under roughly 1.5mm often won’t stitch cleanly, and transparency layers can confuse tracing software into misreading edges.
- Choose your hoop size before exporting, not after. A design digitized for a 4×4 hoop and then squeezed into that size after the fact usually loses density and definition.
- Keep the native file (EMB, ART) as your permanent working copy, and only generate the stitch file export once hoop size and density are finalized.
- Run a test stitch at 100% scale on scrap fabric similar to your final material before committing to a full production run.
Pro Tip: Resizing a finished stitch file instead of the native design file is one of the most common mistakes hobbyists make. Stretching a DST or PES file by even 10% can distort stitch density enough to cause thread breaks, since the machine still executes the original stitch count over a now-different area.
Best Software for Reading and Writing Embroidery Files
Your software choice depends on whether you’re doing true digitizing (building stitches from scratch) or just converting and previewing existing files. Those are different jobs, and using the wrong tool for either wastes time.
- Open-source and free: Ink/Stitch, a plugin for Inkscape, handles a solid range of stitch file formats and works well for hobbyists comfortable with vector tools who want to generate stitch files without a subscription.
- Consumer editors: programs like Embrilliance Essentials focus on combining, resizing within safe limits, and converting existing designs rather than building complex digitizing from a blank canvas.
- Professional digitizing suites: Hatch and Wilcom sit at the top end, offering full manual stitch-path control, underlay customization, and the precision needed for dense commercial-grade designs.
For simple conversions and basic resizing, consumer software handles the job fine. For anything with fine detail, dense fill areas, or a logo that needs to look sharp at production scale, hire a professional digitizer instead of fighting with auto-digitize features in consumer tools. Auto-digitize functions guess at stitch paths based on image contrast, and that guesswork shows up as messy fills and rough edges on anything more complex than basic text.
What File Format Questions Come Up When Ordering Embroidered Apparel?
When you’re placing a bulk order for embroidered polos, jackets, or caps, the supplier handling your logo needs specific inputs to avoid delays. A supplier will typically ask for a vector logo file plus either your preferred stitch format or a request to digitize the design from scratch, since digitizing from a rough JPG takes considerably longer than working from clean vector artwork.
Your deliverables checklist should include:
- A vector logo file (AI, EPS, or SVG)
- Approved color specs (Pantone or thread color matches, if you have brand standards)
- Desired placement and size (left chest, full back, sleeve)
- Either a stitch file already digitized for the target machine, or a clear request to have it digitized
Supplying clean vector files upfront usually shortens turnaround, since the digitizing step doesn’t have to start with cleanup work. Rush orders in particular depend on this: a supplier working from a crisp vector can often move faster than one starting from a blurry logo pulled off a website. Digitizing fees typically apply as a one-time setup cost, then get waived or reduced on reorders once the design is on file. Discountswag’s logo apparel buying guide covers the artwork side of this in more depth if you’re prepping a first order.
Pro Tip: Save your digitized stitch file after your first order. Reordering with the same design on file skips the digitizing fee entirely and shaves days off turnaround.
How Did Embroidery File Formats Develop Over Time?
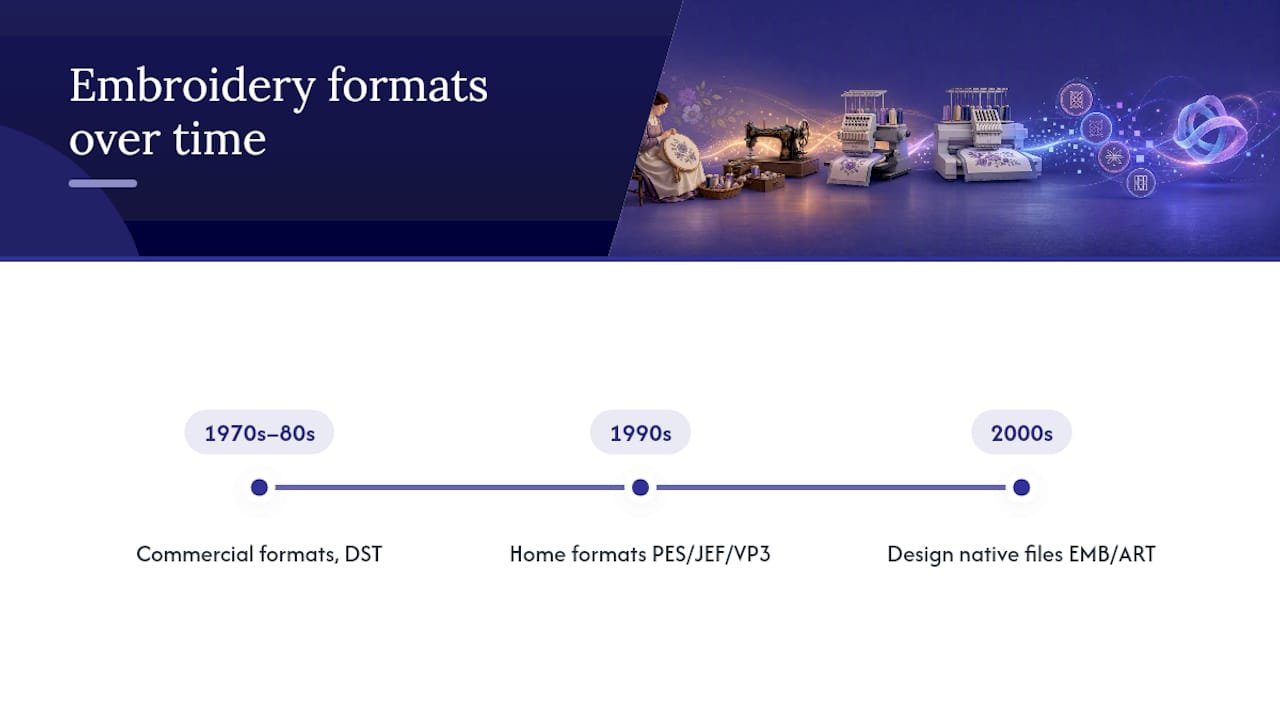
Machine embroidery formats trace back to the earliest computerized multi-head machines of the 1970s and 1980s, when manufacturers like Tajima built proprietary formats tied tightly to their own hardware. DST emerged from that era as Tajima’s stitch format, and its simplicity, just coordinates and basic commands, turned out to be its greatest asset. Because it didn’t depend on brand-specific features, other manufacturers’ equipment could read it too, and DST gradually became the closest thing the industry had to a shared language.
Home embroidery machines arrived later, in the 1990s, bundled with consumer-friendly software from Brother, Janome, and the Husqvarna Viking / Pfaff group. Each brand built its own format around its own software’s features, which is how PES, JEF, and VP3 ended up as separate, incompatible siblings rather than variations of one standard. Color-stop automation, a feature commercial machines never needed since operators managed thread changes manually on production floors, became a defining feature of these home formats.
The rise of digital design software in the 2000s added the native/design file layer, letting digitizers save editable projects (EMB, ART) separately from finished stitch output. That separation, working file versus stitch file, is the backbone of how professional digitizing operates today, and it’s still the single most misunderstood distinction among hobbyists picking up the craft.
Proprietary Formats vs. Open-Source: What’s the Real Difference?
Proprietary formats like PES, JEF, and VP3 are built and controlled by the machine manufacturers that use them. Brother decides what PES supports and how it evolves; Janome does the same for JEF. That control means format specs aren’t always publicly documented, and third-party software has to reverse-engineer support rather than build against an open standard.
DST occupies a strange middle ground: it’s technically proprietary to Tajima, but its simple structure and widespread adoption across the commercial embroidery industry turned it into a de facto open standard by default, even without an official open license.
Open-source tooling like Ink/Stitch approaches the problem from the opposite direction. It’s built and maintained by a community rather than a single manufacturer, and its documentation openly tracks which formats it can read and write, updated as community members reverse-engineer or gain access to new format specs. The tradeoff is coverage: proprietary software from the format’s own manufacturer will almost always handle that manufacturer’s format more completely and reliably than a third-party tool trying to support everything at once. If you’re working exclusively within one brand’s ecosystem, that brand’s own software remains the safest choice. If you’re juggling files across multiple machine brands, open-source tools that support broad format lists become genuinely useful.
Common Embroidery File Compatibility Problems and Fixes
Most “my file won’t work” situations trace back to one of a handful of repeat offenders. A file that loads on one machine but not another usually isn’t corrupted, it’s just the wrong format for that hardware.
The most frequent culprits: a stitch file exported for the wrong brand (a JEF loaded onto a Brother machine, for instance, simply won’t be recognized), a firmware version too old to read a file exported from newer software, or a converted file that lost color-stop data and now stitches everything in one continuous run without pausing for thread changes.
Troubleshooting in order of likelihood: first, confirm the extension actually matches a format your machine’s manual lists as supported. Second, check whether the file was converted from another format, since that’s the most common source of missing color prompts or misplaced trims. Third, try opening the file in a different software package (even a free viewer) to confirm the file itself isn’t corrupted before assuming it’s a machine-side problem. Fourth, if you are working from an inherited or downloaded file with no documentation, treat it as unverified and run a small test stitch before committing fabric to it.
A design that stitches a garbled mess of overlapping lines is almost always a resized stitch file rather than a properly re-digitized one. There’s no fix for that after the fact beyond going back to a native file and re-exporting at the correct size.
Ready to Order Embroidered Apparel? Here’s What to Send Discountswag
Discountswag’s own production process gets faster the moment you send a clean vector logo instead of a screenshot pulled from a website. That’s the practical edge here: skip the back-and-forth over blurry artwork, and your bulk order moves straight to digitizing and stitching.
When you’re ready to place an order, upload a vector file (AI, EPS, or SVG) of your logo, note your preferred thread colors or Pantone matches, and either attach a stitch file already digitized for your target garment or simply request that Discountswag digitize it for you. Rush orders move quickest when the artwork arrives clean the first time, since digitizing from scratch on a tight deadline is where turnaround gets squeezed. First-time logos typically carry a one-time digitizing fee, waived on reorders once your design is saved to file. Browse promotional items for brand awareness to see embroidered apparel options and start a quote request with your artwork ready to go. If you want a second reference on file hygiene before you upload anything, this guide to storing embroidery design files covers version notes worth keeping alongside your own archive.
A Few File Mistakes I’ve Seen Cost People Real Time
The recurring failure isn’t a bad format choice. It’s no native file at all, just a stitch file someone tried to resize, or artwork so low-res the digitizer had to guess at edges. Keep your native file. Send vectors. It’s the cheapest insurance in the whole process.
Sources
- Embroidery formats explained: PES, DST, JEF, and more | Needle Down
- File formats – Ink/Stitch
- Embroidery formats – Embird
- How to convert an image to embroidery data – Brother Support
 Bottle Carriers
 Mugs
Mugs