


Marketing Teams: 3 Approval Steps for Digital Proofs and PPS


A digital proof verifies artwork, layout, and color intent on screen; a preproduction sample (PPS) verifies material, finish, fit, and function in the real world. Use a digital proof to catch typos, dieline errors, and color mismatches before anything gets tooled. Require a PPS whenever a finish, closure, or new mold could fail in ways a monitor simply cannot show you. The two aren’t competitors. They’re sequential checkpoints, and skipping either one is how rework happens.
TL;DR:
- Use digital proofs for layout, copy, and color accuracy, but recognize they cannot fully simulate substrate finishes or metallic effects.
- Order physical preproduction samples only for finishes, structures, or functions that cannot be reliably verified on screen, especially with new tooling or tight color tolerances.
- Follow a strict approval sequence with one designated signer at each hold point, documenting versions, photos, and test results to prevent delays and rework.
- Employ a sampling ladder approach: start with low-cost white structural samples, then move to digital proofs, printed prototypes, and full production samples as risk justifies.
- Prioritize PPS for structural, finish, or mechanical complexities, and avoid skipping this step to reduce late-stage errors and costly rework.
Table of Contents
- Digital Proof vs Preproduction Sample: What Digital Proofs Actually Catch
- Preproduction Samples: What a Physical Prototype Confirms
- Comparing Digital Proofs and PPS Side by Side
- The Approval Sequence: Hold Points and Sign-Off Checklists
- When One Sample Type Is Enough, and When You Need Both
- Lead Time and Cost: What to Budget For
- Common Mistakes That Cause Rework
- How Discountswag Handles Proofs and Samples
- The Bottom Line on Digital Proofs and Preproduction Samples
- How Discountswag helps you speed approvals without cutting corners
- Why marketing teams keep making the same proofing mistake
- Sources
Digital Proof vs Preproduction Sample: What Digital Proofs Actually Catch
Not all digital proofs are equal. A soft proof is a quick on-screen review, often a PDF, meant to catch obvious layout mistakes. A contract proof is calibrated against a defined color target and carries measurable tolerances, the kind vendors are contractually bound to match. Online proofing tools like PageProof sit in between, adding markup, version control, and workflow automation that speed up stakeholder review without sacrificing an audit trail.
A properly reviewed digital proof should confirm:
- Dieline placement and bleed
- Copy accuracy and spelling
- Barcode scannability and placement
- Separations and basic color intent
The catch: digital proofing can simulate press output fairly well, but it can’t fully account for substrate texture, gloss, or special finishes like metallics or spot varnish. Two different monitors, even calibrated ones, can render the same file with slightly different hues. That’s why brand-critical color calls for a true contract proof built on a validated color target, not just a quick PDF sign-off.
Preproduction Samples: What a Physical Prototype Confirms
A preproduction sample is a physical unit made before the full run, and it exists to answer questions no screen can. There are two common types: a white structural sample (unbranded, testing shape and mechanics only) and a production-representative sample (branded, using the actual materials and finish planned for the order).
A PPS review should check:
- Color as it actually appears on the substrate, not on a screen
- Finish quality: embossing, foil, texture, coating
- Fit and function: zippers, caps, seams, closures
- Fill compatibility, if the item holds liquid or product
Documentation matters as much as the sample itself. Record a sample ID, exact materials, the production process used, and any test results, so approval becomes contractual rather than a verbal handshake. For anything mechanical or sealed, run functional tests: drop tests for packaging, leak tests for containers, torque tests for caps and closures.
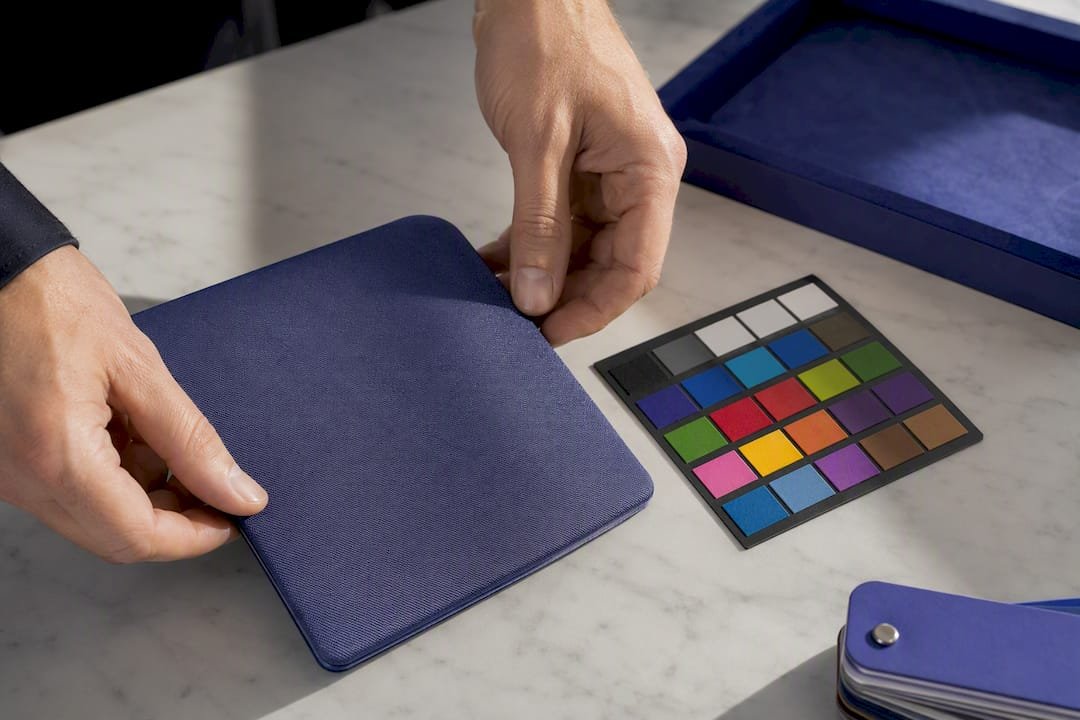
Pro Tip: Photograph the PPS next to a color reference card and store that image with the sample ID. When a dispute comes up three months later, that photo settles it faster than any email chain.
Comparing Digital Proofs and PPS Side by Side
Think of these as two filters catching different failure types, not two versions of the same check. A digital proof answers “does this look right?” A PPS answers “does this work right?”
Here’s how they split:
- What it verifies: Digital proof checks artwork, layout, and color intent. PPS checks material, structure, and function.
- Turnaround: Digital proofs typically return in a day or two. A printed prototype or PPS usually takes one to three weeks, longer with new tooling.
- Cost: Digital proofs are often free or low-cost through vendor proofing portals. PPS costs range from modest sample fees to hundreds of dollars for complex tooled items.
- Risk coverage: Digital proofs catch typos, misaligned dielines, wrong barcodes, and gross color errors. PPS catches finish defects, weak seals, poor fit, and mechanical failures.
The rule of thumb: use the right sample to answer the specific decision question in front of you. If the question is “did the designer place the logo correctly,” a digital proof settles it. If the question is “will this pouch actually seal,” only a physical sample will.
The Approval Sequence: Hold Points and Sign-Off Checklists
A clean approval chain follows a fixed order, and skipping a step is the single most common cause of late-stage rework.
- Digital proof review. Marketing or brand confirms artwork, copy, layout, and barcode placement. Sign off only after checking against the original brief, not a memory of it.
- Printed prototype (when needed). Production or quality confirms structural feasibility, especially for new tooling or unusual folds.
- First-off / production sample. Quality control verifies color on substrate, finish, and function using the actual production process.
- Release to production. A single named approver signs off, with version number, dated photos, and any measurement targets attached to the record.
Each hold point needs one clear owner. Split approval across three people with no final decision maker, and you get delays disguised as thoroughness.
When One Sample Type Is Enough, and When You Need Both
Some jobs genuinely don’t need a physical sample. If you’re reordering an existing item with no changes to material, tooling, or finish, a digital proof alone is usually enough. The moment any of the following appears, order a PPS:
- New tooling or mold
- A specialty finish (foil, emboss, soft-touch coating, metallic ink)
- Brand-critical color with tight tolerance requirements
- Structural complexity: closures, seals, moving parts
The smarter approach is a sampling ladder: start with the cheapest sample that answers your next expensive question, moving from white structural sample to digital proof to printed prototype to full production sample only as risk justifies the added cost.
Pro Tip: Reserve full PPS review for SKUs with new tooling or strict color tolerances, and let repeat, low-risk items ride on digital proof alone. That’s how you keep sample budgets from ballooning across a large product line.
Lead Time and Cost: What to Budget For
Digital proof turnaround usually runs a day or two, sometimes same-day with online proofing tools. A printed prototype or PPS typically takes one to three weeks, and new tooling can stretch that further. Production first-off review adds a few more days before a full run starts.
Cost drivers worth planning around:
- Tooling and mold creation for structurally new items
- Specialty finishes that require separate sample runs
- Shipping physical samples internationally, which can eat a week by itself
You can compress timelines by running digital and printed approvals in parallel where possible, and by using calibrated contract proofs upfront so color disputes don’t resurface at the PPS stage. Whatever hold points you set, build them into the contract or purchase order. A vendor who doesn’t know a PPS approval is a hard gate will schedule production around it anyway.
Common Mistakes That Cause Rework
Most approval failures trace back to a handful of repeat mistakes:
- Skipping the PPS entirely on a job with new tooling or an unfamiliar finish
- Approving color on an uncalibrated monitor, then being surprised when the printed color drifts
- Making artwork changes after the digital proof sign-off without re-approving
- Weak documentation, so nobody can say which sample version was actually approved
If a sample fails inspection, pause the production hold point immediately rather than letting the vendor proceed “to save time.” Get a corrected sample, re-check against the original checklist, and only then release. A red flag at any hold point, an uncalibrated screen, an unsigned checklist, a missing sample ID, is reason enough to stop and fix it before moving forward.
How Discountswag Handles Proofs and Samples
Discountswag combines digital approvals with selective PPS review for promotional and branded merchandise, reserving physical samples for items where finish or structure genuinely carries risk, embossed drinkware, technical apparel, anything with a closure or seal. Standard reorders and simple soft goods move through digital proof alone.
Our operational rule is simple: one named approver per hold point, photo documentation at every stage, and artwork specs locked before production starts. That single-approver rule alone eliminates most of the back-and-forth that delays bulk orders. If you’re planning a bulk run, our bulk order promotional product checklist walks through exactly what to confirm at each stage, and our guide on ordering branded merch without delays covers the artwork specs that prevent late-stage changes. For a deeper look at picking the right promotional items for your next campaign, see our guide on promotional products vs corporate gifts.

The Bottom Line on Digital Proofs and Preproduction Samples
The rule holds: digital proof for artwork, PPS for material and function, both when risk or finish is on the line. Three actions to take before your next order:
- Approve the digital proof first, checking layout, copy, and color intent against the original brief.
- Assess risk honestly. New tooling, special finishes, or tight color tolerances mean you order a PPS. Simple reorders usually don’t.
- Set hold points in writing, with one named approver at each stage and photo documentation attached to the record.
Document every sign-off with a version number and date. It’s the cheapest insurance against a dispute six weeks into production.
How Discountswag helps you speed approvals without cutting corners
If your next order involves a new finish, custom packaging, or a brand-critical color match, the fastest path is getting the right sample type at the right stage, not skipping straight to bulk. Discountswag’s team can walk you through which items on your list need a physical sample and which can move on digital proof alone. Browse our types of branded promotional products to see what’s available for your next campaign, or start your order directly at Discountswag.
Why marketing teams keep making the same proofing mistake
The biggest misconception in this whole process isn’t about proofs or samples individually. It’s the assumption that a fast digital approval means a project is de-risked. It isn’t. A digital proof tells you the file is correct. It says nothing about whether the physical item will hold up, seal properly, or match the brand’s color guide once it’s printed on actual substrate.
I’ve seen teams treat PPS review as an optional step reserved for “big” orders, when the real trigger should be tooling and finish risk, not order size. A 500-unit run with a new closure mechanism needs a PPS more urgently than a 50,000-unit reorder of something that’s shipped successfully a dozen times before. Order size is the wrong variable. Structural and finish novelty is the right one.
The other habit worth breaking: treating the digital proof sign-off as the finish line rather than the starting gate. Once that proof is approved, any artwork tweak, even a “tiny” one, should trigger a fresh round of review. Teams skip this because it feels like bureaucracy. It’s actually the cheapest insurance in the entire process, and it’s the step most likely to get cut when a deadline is tight.
If you take one thing from this, take the sampling ladder idea seriously. Don’t jump straight to a full production sample when a white structural sample would answer the same question for a fraction of the cost. Match the sample to the question, not to habit.
— Jerry
Sources
- GMG ColorProof — products
- Proofing in digital printing — ColorGATE blog
- Digital proof vs printed sample vs production sample — PouchesPack
- Sampling strategy — Zhibang Packaging
 Bottle Carriers
 Mugs
Mugs