


A Logo Rollout Kit Keeps Your Rebrand Consistent From Day One


A logo rollout kit is a prioritized package of master files, brand specs, templates, and a distribution plan that gets your new identity used correctly across every team and channel. The immediate move: inventory every master logo file, lock the color and type specs, and assign one owner to approve requests. Do that first and you get faster adoption, fewer off-brand mistakes, and a launch that looks intentional instead of scrambled.
TL;DR:
- Lock in logo formats and brand specs early, and assign owners to ensure everyone uses the correct files during the rollout.
- Coordinate digital updates to happen simultaneously, including website icons, social headers, and partner materials, to avoid disjointed appearances.
- Build a comprehensive brand kit with all necessary formats, templates, and usage guidelines to prevent off-brand mistakes and facilitate internal adoption.
- Schedule a phased plan that starts at least two months before launch, prioritizing file finalization, printing lead times, and internal training.
- Incorporate physical swag orders early, with thoughtful packaging and presentation, to boost perception and accelerate adoption among employees and partners.
Table of Contents
- The Logo Rollout Kit Checklist Every Team Needs
- Timeline and Milestones: Schedule a Rollout That Fits Your Calendar
- What to Include in a Logo Rollout Kit: Files, Templates, and Formats
- Internal Rollout: Training, Enablement, and Governance
- External Rollout Channels and Partner Coordination
- Operational Tasks: Approvals, Version Control, and Fulfillment
- Discountswag: Real Kit Examples, Fulfillment Options, and Unboxing Tactics
- How Discountswag Can Help You Execute the Rollout Fast
- What I’ve Learned Watching Rollouts Succeed and Fail
- Sources
The Logo Rollout Kit Checklist Every Team Needs
Most rebrands fail internally before they ever fail externally. Someone in sales is still using the old letterhead three months after launch, not out of defiance but because nobody handed them the new one. A working checklist assigns clear owners and sequences tasks so nothing gets missed.
Pre-launch (before any public announcement):
- Design finalizes and exports master logo files in every required format, assigns an owner for questions.
- Brand team locks color codes, typography, and spacing rules into a single reference document.
- Design builds core templates: slide deck, email signature, letterhead, business card, social banner.
- Ops confirms internal distribution method (shared drive, brand portal, or a tool like Canva’s brand kit feature).
- Vendor (print or swag partner) receives files and confirms turnaround for physical items.
Week-of launch:
- Website and app icons update simultaneously, not staggered over days.
- Social profile images, headers, and pinned posts switch at a scheduled hour, not “sometime Tuesday.”
- Partners and key vendors get a short usage guide before they see the change publicly.
- Swag and welcome kits ship or get distributed to employees and press contacts.
- Internal announcement goes out with a link to the full asset library.
Post-launch reinforcement (weeks 2 through 8):
- Audit visible touchpoints for stragglers: old email signatures, outdated slide decks, forgotten vendor listings.
- Refresh any template that got missed in the initial push.
- Roll out a second wave of assets for teams that needed more lead time (legal, HR, regional offices).
The pattern that separates a smooth rollout from a messy one is sequencing. Internal teams get equipped before the public sees anything, and physical materials (business cards, signage, swag) get ordered early enough that a printer’s queue doesn’t become your bottleneck.
Timeline and Milestones: Schedule a Rollout That Fits Your Calendar
Work backward from your announcement date, not forward from “whenever design finishes.” A logo rollout has hard dependencies: templates can’t get built until files are final, and swag can’t ship until templates are approved.
Here’s a realistic milestone structure for a mid-size company:
- 2+ months out: Finalize logo files, color specs, and typography. Brief your promotional products vendor on quantities and timelines.
- 6 to 8 weeks out: Build core templates (slides, signatures, letterhead). Begin sourcing quotes for printed materials and branded swag.
- 4 to 6 weeks out: Place print and swag orders. This is the point of no return for anything requiring production lead time.
- 2 to 4 weeks out: Internal training sessions. Distribute brand kits to team leads. Finalize the external press kit.
- Week of launch: Update all digital properties in a single coordinated window. Ship swag to remote employees.
- Day-of: Public announcement, social rollout, partner notifications.
- Weeks 2 to 8 post-launch: Audit stragglers, reinforce with a second template wave, collect feedback.
Print and apparel vendors typically need real lead time, and rush production almost always costs more per unit. Build in a buffer of at least a week beyond your vendor’s quoted timeline. Anything tighter than that turns a minor supplier delay into a launch-day scramble.
Pro Tip: If your timeline gets compressed, protect the two milestones that are hardest to redo late: the file specs (get them locked, not “mostly final”) and the swag order (place it even if templates aren’t perfect yet, since production takes longer than design revisions).
When you can’t finish everything before launch, triage by visibility and reversibility. A slightly imperfect internal slide template is fixable in week two. A public-facing website with the old logo still live on launch day is not.

What to Include in a Logo Rollout Kit: Files, Templates, and Formats
A kit that only contains a PNG of the new logo isn’t a kit, it’s a single asset. What actually gets used across a company depends on giving every team the exact format they need without making them ask design for a favor.
File formats to include:
- SVG and EPS for anything that needs to scale without quality loss (signage, apparel printing, vendor handoff).
- High-resolution PNG with transparent background for digital use (slides, documents, email).
- PDF for print-ready layouts and press kit distribution.
- JPG only when a transparent background isn’t needed and file size matters.
Color specs, spelled out completely:
- HEX code for web and digital.
- RGB for screen-based design tools.
- CMYK for anything going to a commercial printer.
- Pantone (PMS) number if color-critical print jobs (apparel, signage) require exact matching.
Skipping any one of these format lines is exactly how you end up with a printer producing a slightly-off blue on 500 tote bags. A kit built the way major companies do it, with precise color codes, spacing rules, and clear usage guidance, avoids that entirely.
Template checklist:
- Slide deck master
- Email signature (HTML and plain-text versions)
- Business card layout
- Social banner sizes for each platform you actually use
- One-page press release template
- Letterhead and invoice template
Swag and imprint guidance:
Logo placement on physical items isn’t the same discipline as digital placement. A logo that reads cleanly on a screen can disappear into a shirt’s fold or clash with a mug’s curve. Include a note on minimum imprint size, recommended placement zones, and which logo variation (full color, one-color, reversed) works on which surface. Discountswag’s guide on types of branded promotional products breaks down which items hold detailed logos well and which need a simplified mark.
Include usage permissions directly in the kit, not in a separate email chain. Naming a file “logo_final_v2_USE_THIS.png” is a symptom of a kit that never specified which formats are production-ready and who’s cleared to use which variation.
Internal Rollout: Training, Enablement, and Governance
External audiences forgive a rough launch. Internal teams who can’t find the right file for six months will quietly keep using the old logo, and that’s a governance failure, not a design failure.

The sequence matters more than most brand teams expect. Leadership announces the change first, with context on why it happened. Team leads get their kits next, ahead of the general staff, so they can answer questions before employees ask them. Then general training sessions walk through where files live and how to request exceptions.
Distribution and access:
- Central brand portal or shared drive as the single source of truth.
- A tool-embedded brand kit (Canva, Adobe, or similar) so approved assets show up where people are already working, not buried in a PDF nobody opens twice.
- One clear contact or channel for “I need a file I can’t find.”
Static reference documents get ignored. Assets embedded directly into the design tools your team already uses get adopted faster because nobody has to leave their workflow to find them.
Governance basics:
- Define who approves off-template requests (a single brand manager, not a committee).
- Set permissions so only approved formats are downloadable by default.
- Publish a short exceptions process for legitimate edge cases (legal documents, regional partners with different requirements).
Simple adoption metrics:
Track how many departments have swapped their email signature within two weeks, how many old-logo assets get flagged in a post-launch audit, and how many exception requests come through the approval channel. A spike in exception requests after week three usually means a template is missing, not that people are ignoring the rules.
Companies with consistently applied branding tend to see stronger internal engagement outcomes, which is a reasonable argument for spending real budget on training sessions instead of a single all-hands email.
Pro Tip: Reversion to old logos almost always traces back to one missing template, not employee carelessness. Audit which specific file people are recreating from scratch, and that’s the gap in your kit.
External Rollout Channels and Partner Coordination
External updates need a priority order, because trying to change everything simultaneously guarantees something breaks. Website and app icons come first since they’re the highest-traffic touchpoints. Social headers and profile images follow within the same day. Partner and press kits go out on a tighter, pre-coordinated schedule so nobody sees the new logo from a third party before your own announcement.
Priority sequence:
- Website homepage, favicon, and app icons
- Key landing pages and product screenshots
- Social profile images, cover photos, and pinned content
- Partner-facing materials (co-branded pages, joint press releases)
- Press kit distribution to media contacts
Build a downloadable press and partner kit with explicit usage rules attached. Companies handling major identity changes tend to explain both the change and the reasoning behind it in their public announcement, which reduces the “why did you change this” noise that otherwise dominates the first week.
Include a short trademark and co-branding note in any partner kit: which logo variations partners may use, whether they need approval for altered versions, and who to contact for licensing questions. This single page prevents the most common post-launch headache, a partner’s website running your old mark for months because nobody sent them the update. Discountswag’s press kit strategy guide covers what physical materials belong alongside the digital kit for media outreach.
Operational Tasks: Approvals, Version Control, and Fulfillment
The parts of a rollout that never make it into a strategy deck, version control, approval sign-offs, shipping logistics, are usually what determine whether the launch feels controlled or chaotic.
Keep one cloud-based asset library as the single source of truth, with clear version numbers and a changelog. “Final_v3” living on three different desktops is how outdated files end up on a vendor’s press.
Approval matrix basics:
- Brand or marketing lead: sign-off on all customer-facing assets.
- Legal: review for trademark and co-branding language before partner distribution.
- Department heads: confirm their team’s templates are usable before general rollout.
Fulfillment planning:
- Kitting for onboarding or press packages (multiple items bundled and shipped as one unit).
- Multi-location shipping if you have several offices or retail sites.
- Rush ordering as a built-in fallback, not a last resort you discover you need on launch week.
- A documented fallback plan for what happens if a vendor misses a deadline (digital-only launch, delayed swag wave).
| Task | Owner | When |
|---|---|---|
| Lock master files and specs | Design lead | 2+ months out |
| Approve partner co-branding language | Legal | 4-6 weeks out |
| Place swag and print orders | Ops/vendor | 4-6 weeks out |
| Confirm multi-location shipping addresses | Ops | 2-4 weeks out |
| Post-launch asset audit | Brand manager | Weeks 2-8 |
Post-launch fixes happen to every rollout. Build a lightweight emergency process, one person who can push an updated file within 24 hours, so a typo in a template doesn’t sit live for a week because nobody knew who owned the fix.
Discountswag: Real Kit Examples, Fulfillment Options, and Unboxing Tactics
Discountswag builds three kit types most rebrands need: employee onboarding kits (apparel, drinkware, a welcome card with brand guidelines), press outreach kits (notebooks, tech accessories, a printed one-pager), and partner bundles for co-branded events.
Fulfillment scales with your footprint:
- Single-site orders ship as one bulk delivery to a headquarters address.
- Multi-location orders split and ship directly to each office, which matters for companies with five, ten, or more sites trying to launch on the same day.
- Rush ordering exists for the timelines that got compressed anyway, which is most of them.
- Imprint area and placement get reviewed per item, since a logo that looks sharp on a tote bag can crowd a pen barrel.
Presentation matters more than most brand teams budget for. Thoughtfully packaged swag and unboxing experiences measurably increase how employees and partners perceive a new kit, which translates directly into faster adoption. A logo on a plain shipping box gets glanced at. A logo on branded tissue paper inside a branded box gets photographed and posted internally.
How Discountswag Can Help You Execute the Rollout Fast
Discountswag is built for exactly the operational gap most brand teams hit: you’ve locked the files and the templates, and now you need physical materials produced and shipped on a real deadline, not a hopeful one. Custom kits, rush production, and multi-location fulfillment map directly onto the checklist above, so you’re not stitching together three vendors for one launch.
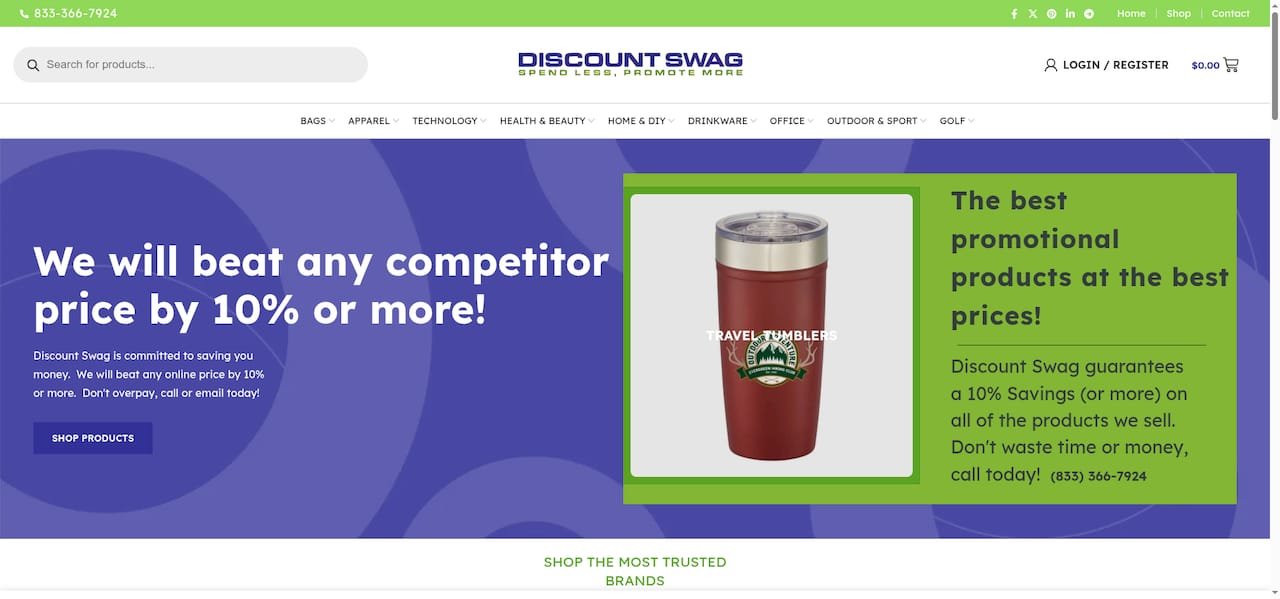
Buy a kit rather than assembling one in-house when your timeline is under six weeks, when you have more than two office locations to ship to, or when you simply don’t have a procurement team with bandwidth to chase print quotes. Assembling in-house makes sense when your rollout is small, single-site, and your lead time comfortably clears eight weeks.
Browse promotional items built for brand awareness to see kit options that match onboarding, press, and partner use cases, and get a quote before your next milestone deadline passes you by.
What I’ve Learned Watching Rollouts Succeed and Fail
The biggest pitfall isn’t the design work, it’s sequencing. Teams spend eight weeks perfecting the logo mark and then give employees three days to switch every template before a public announcement. Flip that ratio. Internal readiness deserves the longer runway, because external audiences only see the finished result, while employees have to live inside the transition.
The second pitfall is treating the kit as a one-time PDF. A brand kit that isn’t embedded in the tools people actually use gets ignored within a month, and old templates quietly reappear.
The third is skipping the swag order until “things calm down.” Production lead times don’t care about your calendar, and a rollout without physical materials on day one feels unfinished even when the website looks perfect.
Start here: assign one owner today, pull every master file into a single folder, and place one pilot kit order before you finalize the rest of your templates. Momentum on a real order tends to surface gaps in your specs faster than another planning meeting will.
— Jerry
Sources
- How to build a brand kit + examples | Canva
- How to build a brand identity kit (with examples) | Nulab
- 10 brand kit examples plus tips and tools – Piktochart
- Engagement Is a Competitive Advantage | Gallup
 Bottle Carriers
 Mugs
Mugs